Azure Push Notifications with Xamarin on iOS and Android

I'm having a quick interlude from the AD B2C posts (which will continue shortly) to jump into push notifications. At the time of writing, most of the documentation and tutorials out there on getting push notifications working on both Android and iOS using Azure Notifications Hubs appear to be a little out of date and not working, unusually including the official Microsoft documentation and associated code repository. This can cause a lot of headaches and eat time unnecessarily, so here's a post on how to get this up and running here in October 2021.
The MS documentation does walk you through setting up the following very nicely:
- An Azure Notification Hub
- The necessary iOS identifier, certificates and provisioning profiles
- The necessary Firebase account and key
You can find this documentation here:
- iOS: https://docs.microsoft.com/en-us/azure/notification-hubs/xamarin-notification-hubs-ios-push-notification-apns-get-started
- Android: https://docs.microsoft.com/en-us/azure/notification-hubs/xamarin-notification-hubs-push-notifications-android-gcm
I won't repeat those steps here so I recommend you refer to those docs to complete the initial setup required. Be sure to come back here for the Xamarin bits though, as this is where things differ.
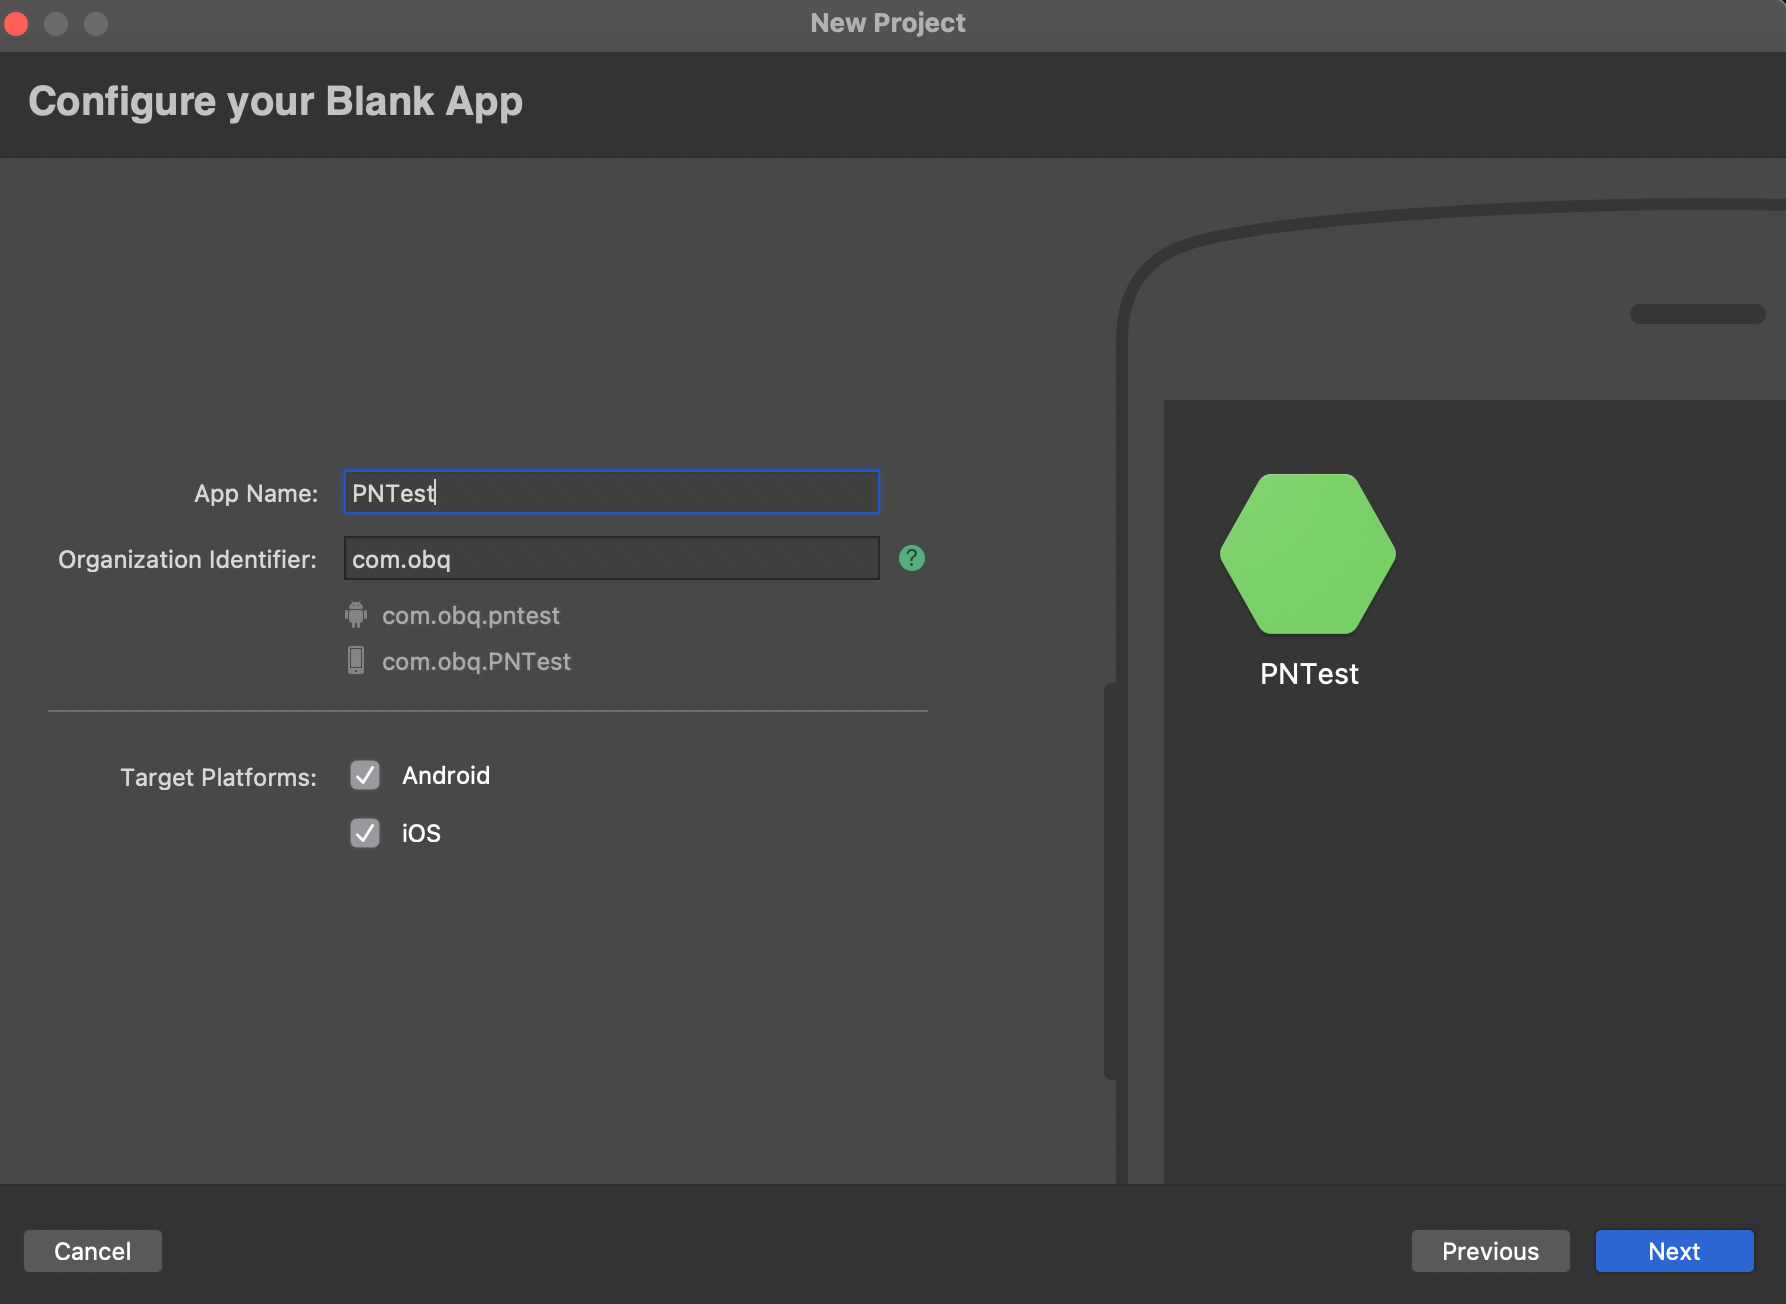
We'll start a new app from scratch to interact with an existing Azure Notification Hub. As with my other recent blog posts, the screenshots are taken from Visual Studio for Mac, but should be very similar to the Windows experience. One of these days I'll figure out why my Parallels VM runs so slowly and I'll do some work in VS for Windows again :) Recently the performance of Visual Studio for Mac during debugging is motivating me to do this!
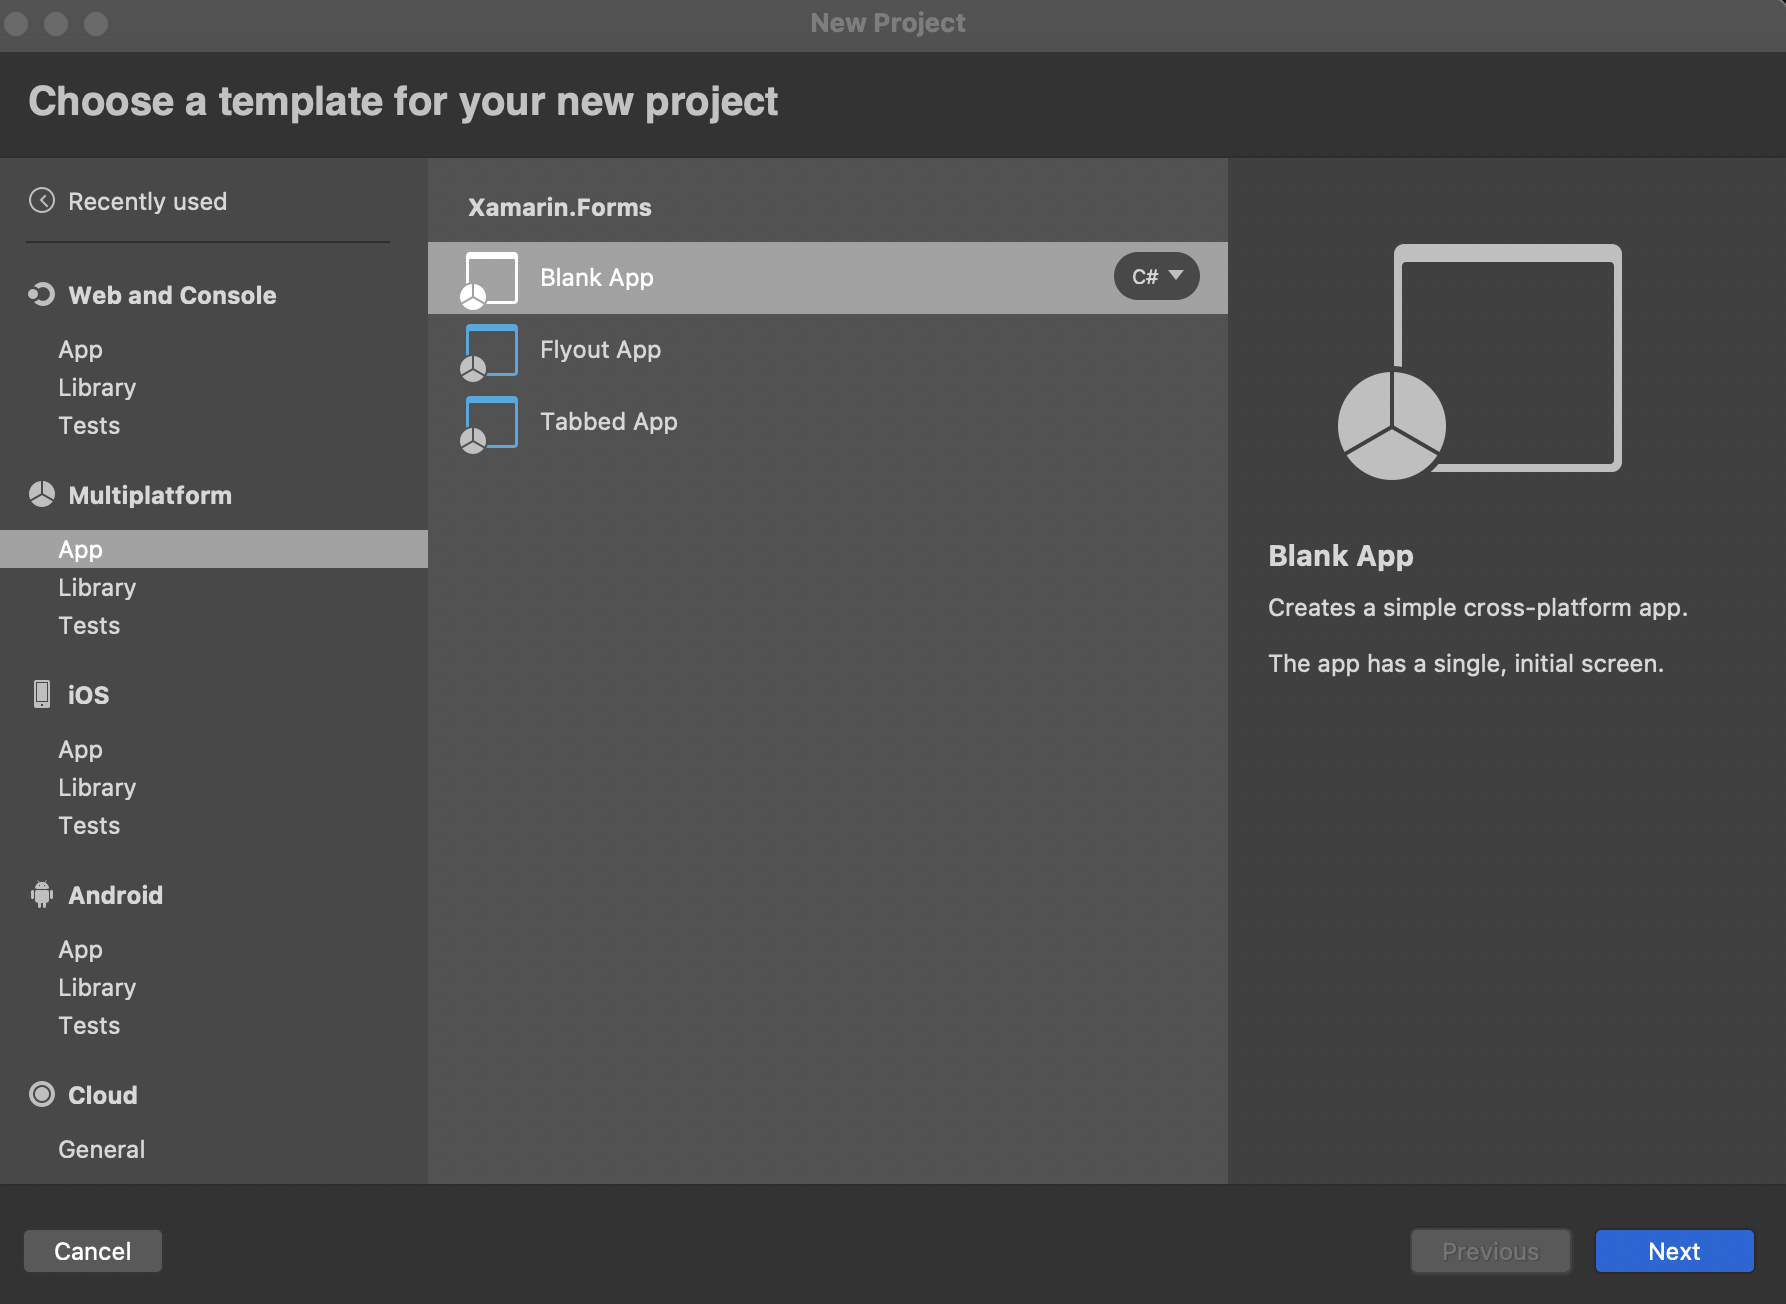
So, create a new, blank Xamarin.Forms app.
The full source code referenced in this post can be found here:
We're going to use the following NuGet packages, so add these to your projects first:
Android
- Xamarin.Azure.NotificationHubs.Android
- Xamarin.Firebase.Messaging
- Xamarin.GooglePlayServices.Base (without this you cannot set the necessary build action on your google-services.json file - more on this later)
- Xamarin.Google.Dagger (without this you'll get a runtime error complaining that you haven't initialized your FirebaseApp)
iOS
- Xamarin.Azure.NotificationHubs.iOS
Next we'll add a Constants.cs file to the .NetStandard project, where we'll define the name of the notification hub that we're using and the connection string required to communicate with it.
public class Constants
{
public const string ListenConnectionString =
"Endpoint=sb://yournotificationhub.servicebus.windows.net/;SharedAccessKeyName=DefaultListenSharedAccessSignature;SharedAccessKey=yoursharedaccesskey";
public const string NotificationHubName =
"yourNotificationHubName";
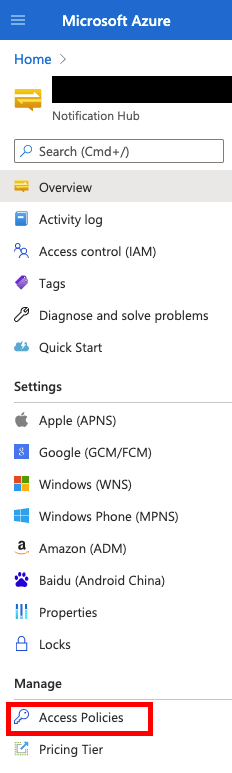
}You can find the required values for these constants in the Azure portal. Navigate to the notification hub that you've set up and select "Access Policies" under "Manage" on the left:
In there you'll see the DefaultListenSharedAccessSignature, along with its connection string:

Copy this (the top one) and paste it into the value of the ListenConnectionString constant in its entirety. Copy the name from the top of this screen as well and paste that into the value of the NotificationHubName constant.

The bit that you need is underlined (and helpfully obfuscated :) ).
We're going to make use of the Xamarin.Forms Dependency Service to run different code on each platform to interact with the notification hub, so the next thing we need to to is define an interface for the service class we're going to use. Create INotificationHubService in your shared code.
using System.Collections.Generic;

namespace PNTest
{
    public interface INotificationHubService
    {
        void AddTag(string tag);
        void ClearTags();
        List<string> GetTags();
    }
}
You can see that this will let us add tags, clear tags and retrieve tags.
The next bit of coding that we'll add is a page to the .Net Standard project that shows us the name of the Azure Notification Hub we're connected to and gives us ways of:
- Listing all tags we're currently listening for
- Clearing all tags
- Adding new tags
i.e. all the things that the service class will do for us.
To do this we'll just modify the existing MainPage.xaml that was created for us by the project template.
<StackLayout>
    <Frame BackgroundColor="#2196F3" Padding="24" CornerRadius="0">
        <StackLayout>
            <Label Text="Push Notification Testing" HorizontalTextAlignment="Center" TextColor="White" FontSize="36"/>
            <Label Text="Hub Name:" HorizontalTextAlignment="Start" TextColor="White" FontSize="12" />
            <Label Text="{Binding HubName}" HorizontalTextAlignment="Start" TextColor="White" FontSize="12" />
        </StackLayout>
    </Frame>

    <Label Text="Tags subscribed to:"
           FontSize="Title"
           Padding="30,10" />
    <CollectionView ItemsSource="{Binding CurrentTags}" />

    <Label Text="Enter a tag to add:"
           FontSize="Title"
           Padding="30,10"/>
    <Entry Text="{Binding NewTag}" />

    <Button Text="Add"
            Command="{Binding AddTagCommand}" />

    <Button Text="Clear"
            Command="{Binding ClearTagsCommand}" />

    <Button Text="Refresh"
            Command="{Binding RefreshTagsCommand}" />
</StackLayout>
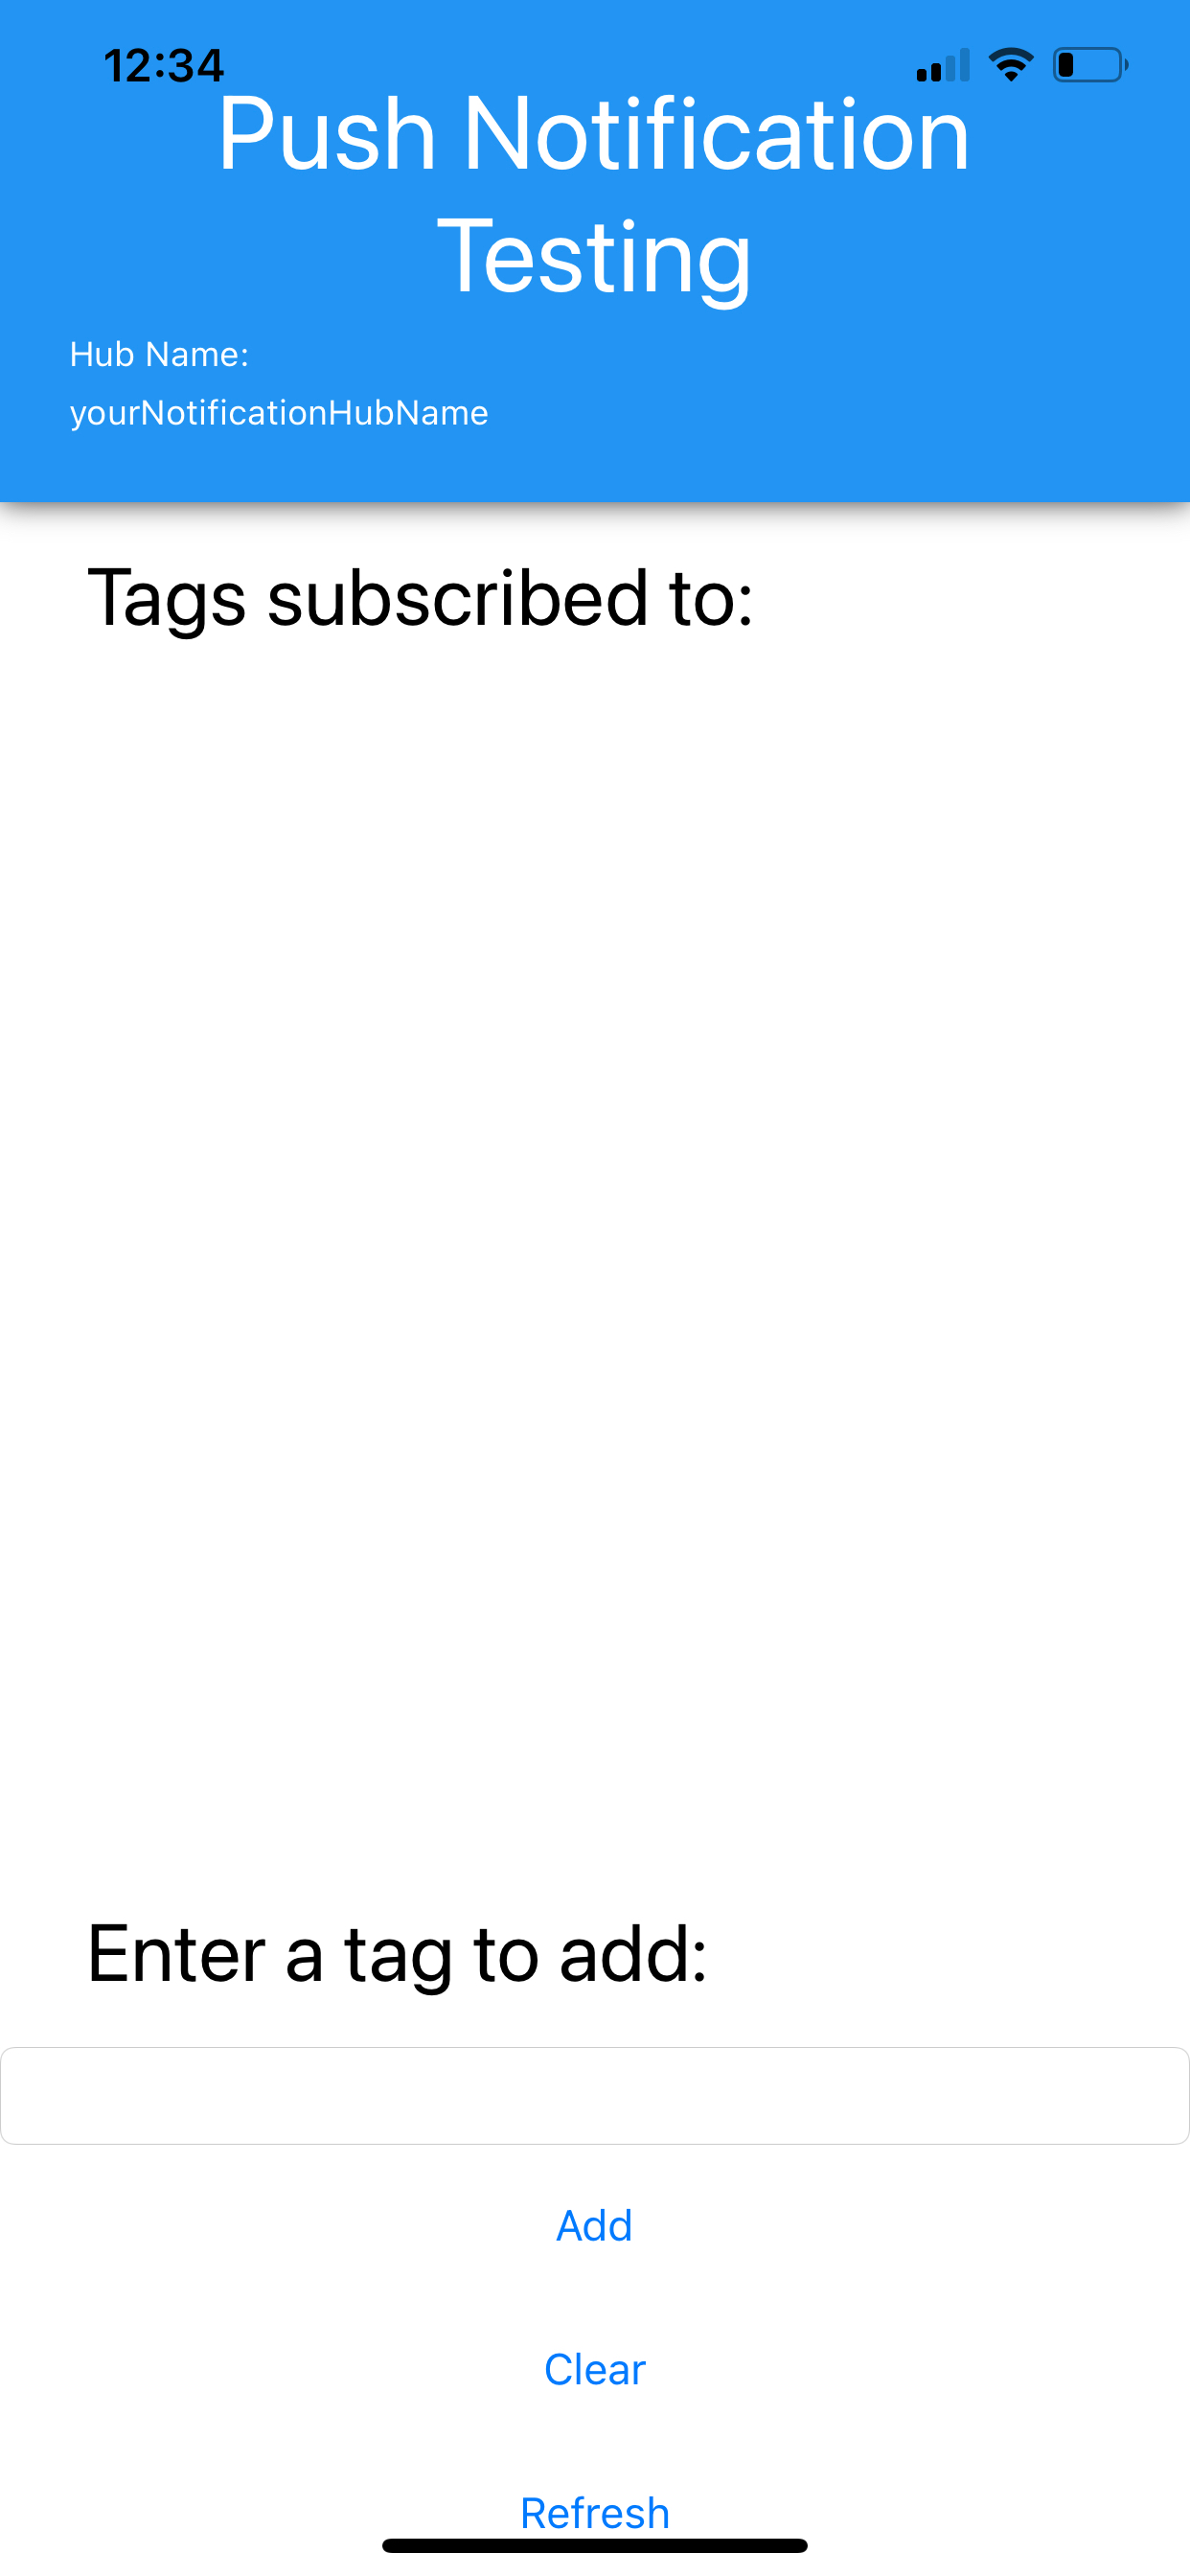
This is pretty straightforward and won't win any design awards, but it meets our needs for now. You'll see in the xaml here that we're binding to view model properties, so let's add the MainViewModel.cs class next. This will need to implement INotifyPropertyChanged to support the minimalist Mvvm approach that we'll be using. For those not familiar with that, the implememtation looks like this:
    #region PropertyChangedNotification bits
    public event PropertyChangedEventHandler PropertyChanged;

    protected virtual void RaisePropertyChanged([CallerMemberName] string propertyName = null)
    {
        RaisePropertyChangedExplicit(propertyName);
    }

    protected virtual void RaisePropertyChangedExplicit(string propertyName = null)
    {
        PropertyChanged?.Invoke(this, new PropertyChangedEventArgs(propertyName));
    }

    protected bool SetProperty<T>(ref T property, T newValue, [CallerMemberName] string propertyName = null)
    {
        bool isSuccessful = false;

        if (!Equals(property, newValue))
        {
            property = newValue;
            RaisePropertyChangedExplicit(propertyName);
            isSuccessful = true;
        }

        return isSuccessful;
    }
    #endregion
This puts the necessary plumbing in place that lets us just update properties in our view model and have the new values appear on screen. Those properties will be:
    #region Properties
    private string _hubName;
    public string HubName { get => _hubName; set => SetProperty(ref _hubName, value); }

    private string _newTag;
    public string NewTag { get => _newTag; set => SetProperty(ref _newTag, value); }

    private ObservableCollection<string> _currentTags;
    public ObservableCollection<string> CurrentTags { get => _currentTags; set => SetProperty(ref _currentTags, value); }
    #endregion
You should recognise these from the xaml that we looked at earlier. Next come the commands that we've bound to the buttons.
    #region Commands
    private ICommand _addTagCommand = null;
    public ICommand AddTagCommand => _addTagCommand = _addTagCommand ?? new Command(DoAddTagCommand);

    private ICommand _clearTagsCommand = null;
    public ICommand ClearTagsCommand => _clearTagsCommand = _clearTagsCommand ?? new Command(DoClearTagsCommand);

    private ICommand _refreshTagsCommand = null;
    public ICommand RefreshTagsCommand => _refreshTagsCommand = _refreshTagsCommand ?? new Command(DoRefreshTagsCommand);
    #endregion
...and then the methods that they call:
    #region Methods
    private void DoAddTagCommand()
    {
        notificationHubService.AddTag(NewTag);
        RefreshTags();
    }

    private void DoClearTagsCommand()
    {
        notificationHubService.ClearTags();
        RefreshTags();
    }

    private void DoRefreshTagsCommand()
    {
        RefreshTags();
    }

    private void RefreshTags()
    {
        CurrentTags = new ObservableCollection<string>(notificationHubService.GetTags());
    }
    #endregion
These are all pretty straightforward so far, as they leave all the hard work to the service class that we'll write in a moment. For now we'll need to declare this:
    #region Services
    private readonly INotificationHubService notificationHubService;
    #endregion
...and instantiate it in the constructor:
    #region Constructors & initialisation
    public MainViewModel()
    {
        notificationHubService = DependencyService.Get<INotificationHubService>();
        HubName = Constants.NotificationHubName;
    }
    #endregion
You'll see that we're also assigning the HubName property here from the Constants so that it will appear on the screen. Finally, if you haven't added these already, you'll need some using statements at the top:
using System.Collections.ObjectModel;
using System.ComponentModel;
using System.Runtime.CompilerServices;
using System.Windows.Input;
using Xamarin.Forms;
The last thing we need to do here in the shared code is instantiate the view model and set it as the binding context for the view in the code behind - MainPage.xaml.cs:
public partial class MainPage : ContentPage
{
    public MainPage()
    {
        InitializeComponent();
        BindingContext = new MainViewModel();
    }
}
Ok - that's it for the shared code. Here's where the fun starts.
There's a selection of NuGet packages that you can use for Push Notifications, and various ways of integrating them into your iOS and Android apps. We're going to use the Xamarin.Azure.NotificationHubs.Android and Xamarin.Azure.NotificationHubs.iOS packages, as they handle it nicely and do a lot of the heavy lifting for you.
Let's look at iOS first, because it's easier!
You should have already added the Xamarin.Azure.NotificationHubs.iOS NuGet package to the iOS project, but if you haven't then do that now.
At the time of writing this is on version 3.1.1.
Make sure that the BundleIdentifier in Info.plist matches the application identifier / certificate / provisioning profile that you've set up for the exercise. See the above referenced Microsoft documentation for assistance with this if necessary.
In the FinishedLaunching method in AppDelegate.cs, add the following lines:
        MSNotificationHub.SetDelegate(new AzureListener());
        MSNotificationHub.Start(Constants.ListenConnectionString, Constants.NotificationHubName);
You'll need this using statement as well:
using WindowsAzure.Messaging.NotificationHubs;Next add the AzureListener class, which needs to implement the MSNotificationHubDelegate interface.
using UIKit;
using Windows.Azure.Messaging.NotificationHubs;

namespace PNTest.iOS
{
    public class AzureListener : MSNotificationHubDelegate
    {
        public override void DidReceivePushNotification(MSNotificationHub notificationHub, MSNotificationHubMessage message)
        {
            string alertTitle = message.Title ?? "Notification";
            string alertBody = message.Body;

            ShowNotification(alertTitle, alertBody);
        }

        private void ShowNotification(string title, string body)
        {
            UIAlertController alert = UIAlertController.Create(title, body, UIAlertControllerStyle.Alert);
            alert.AddAction(UIAlertAction.Create("Ok", UIAlertActionStyle.Default, null));
            UIApplication.SharedApplication.KeyWindow.RootViewController.PresentViewController(alert, true, null);
        }
    }
}
The last step for iOS is to implement that service class interface that will handle the remaining interaction with the notification hub. Add AzureNotificationHubService.cs to your iOS project.
using System.Collections.Generic;
using PNTest.iOS;
using WindowsAzure.Messaging.NotificationHubs;
using Xamarin.Forms;

[assembly:Dependency(typeof(AzureNotificationHubService))]
namespace PNTest.iOS
{
    public class AzureNotificationHubService : INotificationHubService
    {
        #region Constructors & initialisation
        public AzureNotificationHubService()
        {
        }
        #endregion

        #region Methods
        public void AddTag(string tag)
        {
            MSNotificationHub.AddTag(tag);
        }

        public void ClearTags()
        {
            MSNotificationHub.ClearTags();
        }

        public List<string> GetTags()
        {
            List<string> allTags = new List<string>();

            Foundation.NSArray<Foundation.NSString> tags = MSNotificationHub.GetTags();

            if (tags?.Count > 0)
            {
                foreach (string tag in tags)
                {
                    allTags.Add(tag);
                }
            }

            return allTags;
        }
        #endregion
    }
}
Note the assembly[] decoration outside the namespace. This registers the class with the Xamarin.Forms DependencyService and is what enables the shared code to retrieve an instance of this class using DependencyService.Get<INotificationHubService>();
You can see how this provides methods to add and clear tags, as well as to retrieve all existing tags. The latter gives us a platform specific NSArray that we manipulate a little before passing back to the calling code.
Providing you've completed the application identifier, certificate, provisioning profile and Azure notification hub setup as detailed in the MS docs you should now be up and running on iOS.
Now for Android...
First, ensure you've added the necessary NuGet packages before we begin:
- Xamarin.Azure.NotificationHubs.Android (v1.1.4.1)
- Xamarin.Firebase.Messaging (v122.0.0)
- Xamarin.Google.Dagger (v2.37.0)
- Xamarin.GooglePlayServices.Base (v117.6.0)
Those version numbers are all as at the time of writing and should be seen as minimum values.
Next you need to make some changes to AndroidManifest.xml, so open this with a source code editor and make it look like this:
<manifest xmlns:android="http://schemas.android.com/apk/res/android" android:versionCode="1" android:versionName="1.0" package="com.obq.pntest">
	<uses-sdk android:minSdkVersion="21" android:targetSdkVersion="30" />
	<application android:label="PNTest.Android" android:theme="@style/MainTheme">
		<receiver android:name="com.google.firebase.iid.FirebaseInstanceIdInternalReceiver" android:exported="false" />
		<receiver android:name="com.google.firebase.iid.FirebaseInstanceIdReceiver" android:exported="true" android:permission="com.google.android.c2dm.permission.SEND">
			<intent-filter>
				<action android:name="com.google.android.c2dm.intent.RECEIVE" />
				<action android:name="com.google.android.c2dm.intent.REGISTRATION" />
				<category android:name="${applicationId}" />
			</intent-filter>
		</receiver>
    </application>
	<uses-permission android:name="android.permission.ACCESS_NETWORK_STATE" />
	<uses-permission android:name="android.permission.INTERNET" />
	<uses-permission android:name="com.google.android.c2dm.permission.RECEIVE" />
	<uses-permission android:name="android.permission.WAKE_LOCK" />
	<uses-permission android:name="android.permission.GET_ACCOUNTS" />
</manifest>
The actual changes you need to make are to add those two "receiver" elements inside the "application" node, and to add the "uses-permission" elements.
Next, download google-services.json from the Firebase console if you haven't already, and add it to the root of your Android project. Give it a build action of "GoogleServicesJson".

If this build action is not available, ensure that you've added the Xamarin.GooglePlayServices.Base NuGet packages listed above and restart Visual Studio.
Now we move onto MainActivity.cs. Change the "Activity" decorator to the following:
[Activity(
    Label = "PNTest",
    LaunchMode = LaunchMode.SingleTop,
    Icon = "@mipmap/icon",
    Theme = "@style/MainTheme",
    MainLauncher = true,
    ConfigurationChanges = ConfigChanges.ScreenSize | ConfigChanges.Orientation | ConfigChanges.UiMode | ConfigChanges.ScreenLayout | ConfigChanges.SmallestScreenSize)]
    public class MainActivity : global::Xamarin.Forms.Platform.Android.FormsAppCompatActivity
i.e. add the "LaunchMode" as detailed above.
Next, add the following two lines to the OnCreate method, after base.OnCreate(...):
NotificationHub.SetListener(new AzureListener());
NotificationHub.Start(this.Application, Constants.NotificationHubName, Constants.ListenConnectionString);
This is the Android equivalent of the similar two lines that we added to AppDelegate.cs on iOS. You'll see that we're using those constant values here again, so if you've already written and tested on iOS then you know these are correct. I've also added this line, which we'll reference in a moment.
internal static readonly string CHANNEL_ID = "my_notification_channel"This code also requires an AzureListener class, so let's write that next.
using Android.App;
using Android.Content;
using AndroidX.Core.App;
using WindowsAzure.Messaging.NotificationHubs;

namespace PNTest.Droid
{
    public class AzureListener : Java.Lang.Object, INotificationListener
    {
        public AzureListener()
        {
        }

        public void OnPushNotificationReceived(Context context, INotificationMessage message)
        {
            Intent intent = new Intent(context, typeof(MainActivity));
            intent.PutExtra("TitleKey", message.Title);
            intent.PutExtra("MessageKey", message.Body);

            PendingIntent pendingIntent = PendingIntent.GetActivity(context, 0, intent, PendingIntentFlags.OneShot);

            NotificationCompat.Builder notificationBuilder = new NotificationCompat.Builder(context, MainActivity.CHANNEL_ID);

            notificationBuilder
                .SetContentTitle(message.Title)
                .SetSmallIcon(Resource.Drawable.ic_launcher)
                .SetContentText(message.Body)
                .SetAutoCancel(true)
                .SetShowWhen(false)
                .SetContentIntent(pendingIntent);

            NotificationManagerCompat notificationManager = NotificationManagerCompat.From(context);
            notificationManager.Notify(0, notificationBuilder.Build());
        }
    }
}
A couple of things to note here:
- This class should inherit from Java.Lang.Object and implement INotificationListener
- Some of the documentation I've seen shows this code using NotificationCompat and NotificationManager. You'll see that the code above uses NotificationManagerCompat instead of NotificationManager.
Lastly we need an Android specific implementation of INotificationHubService. That looks like this:
using System.Collections.Generic;
using PNTest.Droid;
using WindowsAzure.Messaging.NotificationHubs;
using Xamarin.Forms;

[assembly: Dependency(typeof(AzureNotificationHubService))]
namespace PNTest.Droid
{
    public class AzureNotificationHubService : INotificationHubService
    {
        #region Constructors & initialisation
        public AzureNotificationHubService()
        {
        }
        #endregion

        #region Methods
        public void AddTag(string tag)
        {
            NotificationHub.AddTag(tag);
        }

        public void ClearTags()
        {
            NotificationHub.ClearTags();
        }

        public List<string> GetTags()
        {
            List<string> allTags = new List<string>();

            Java.Util.IIterator iterator = NotificationHub.Tags.Iterator();

            while (iterator.HasNext)
            {
                allTags.Add((string)iterator.Next());
            }

            return allTags;
        }
        #endregion
    }
}
Note the assembly[] decoration again, to register this class with the Xamarin.Forms DependencyService.
This looks very similar to the iOS implementation - just the GetTags method is a little different as it handles and manipulates an IIterator into a list of strings to return.
You should now be able to run this app on either platform and see notifications being received and processed.
If you get a runtime error on Android complaining that you haven't initialized the FirebaseApp, that may be a sign that you haven't added the Xamarin.Google.Dagger NuGet package. This is one of the steps that's currently missing from the documentation.
You can use the Azure Portal to send test notifications. Select your notification hub and then choose "Test Send" in the "Support + Troubleshooting" section on the left, then choose the platform you want to send to (Apple or Android).
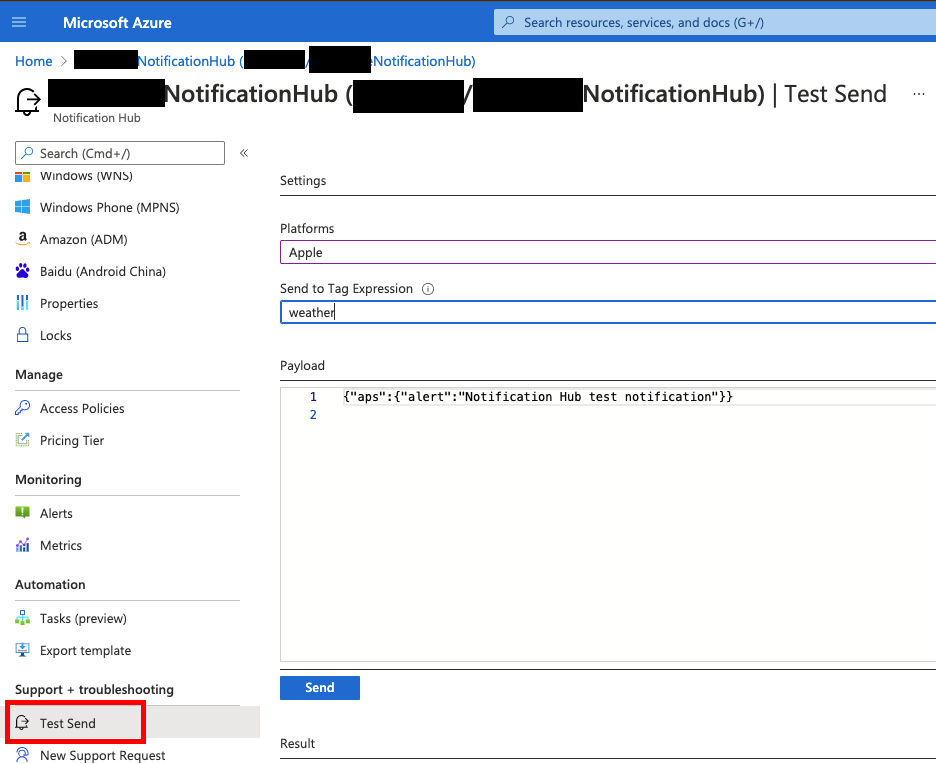
If you send the default notification then you see see it arrive in your app.
You can now use the app to subscribe to a tag. Add "weather" into the field where you can add a tag in the app and click "Add" - "weather" should then appear in the list of current tage. Now go back to the test send page in the Azure portal and enter "sport" in the tag field and hit send. You should see that the notification does not arrive in your app, and that the portal reports that there were no registrations to send it to. Now change the tag in the portal to "weather" and send again. You should now see this notification arrive in your app and get processed. Next, click the button to clear all tags from the app, and then send the same notification again from the portal. You should see that the notification does not arrive, and the portal reports there were no registrations to send it to You can repeat this test defining and using your own tags.
Remember that if you don't use tags during testing and you have more than 10 devices registered, you may or may not received notifications sent via the Test Send facility of the notification hub. If you don't provide any tags, it will select 10 registered devices at random to send to, which may or may not include your device.
Happy notifying!