1. Set up and configure Azure AD B2C

This is the first post in a series that covers creating a Xamarin.Forms app and an API, both secured by Azure AD B2C, detailing the Azure configuration and the necessary code.
The first part of this process is setting up AD B2C. To keep the number of variables in play to a minimum (I use that phrase loosely where Azure is concerned!) I'll cover the setup in Azure, and will test and confirm it using Postman. The iOS and Android apps will follow in the next post.
You'll see lots of redacted ids here - I may have got a bit carried away following a conversation with the Azure billing department :) Information on the billing model is here:
https://docs.microsoft.com/en-us/azure/active-directory-b2c/billing
...and details of the costs of AD B2C can be found here:
https://azure.microsoft.com/en-us/pricing/details/active-directory/external-identities/
At the time of writing the first 50,000 monthly active users are free, but I'm being wildly optimistic about the popularity of these posts and locking it down :) There should be enough info visible to distinguish between them, and the last post in the series will include a summary of all the ids and how they relate to each other.
OK - let's get started.
Head over to https://portal.azure.com. You should be able to sign up for a free account if you don't already have one.
From the main portal page, click on "Create a resource"
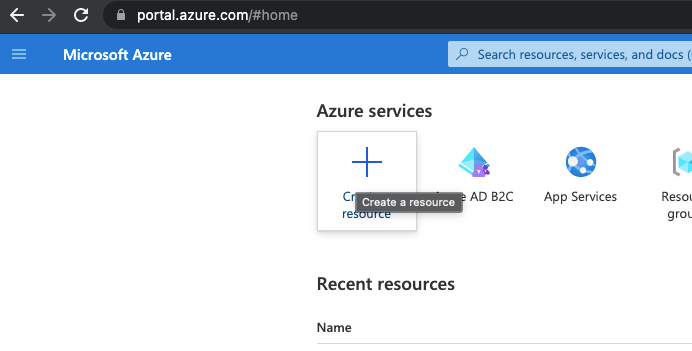
Caveat: Azure is a fast changing beast, so these screenshots may become dated before too long.
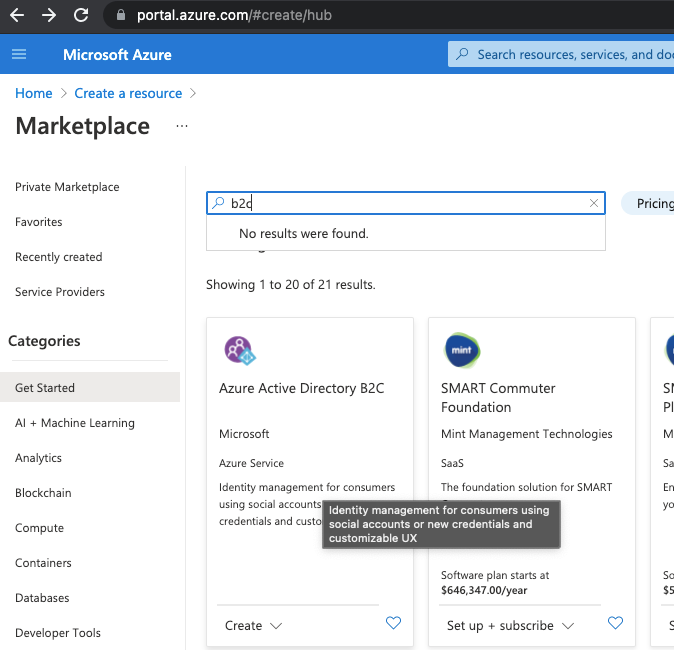
Search for "B2C' and click on "Azure Active Directory B2C"
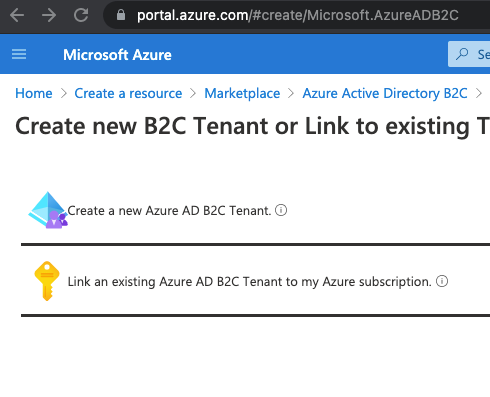
Click Create and then choose "Create a new Azure B2C Tenant"

Complete the fields as follows (you won't be able to use these exact details because I already have):

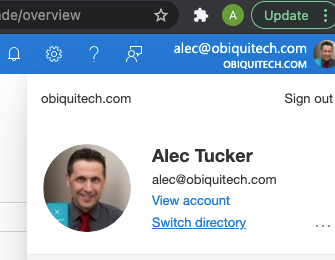
To start using this you'll need to switch directories:

Now in the portal search for "AD B2C" and select it, and you'll see that you can start using it.
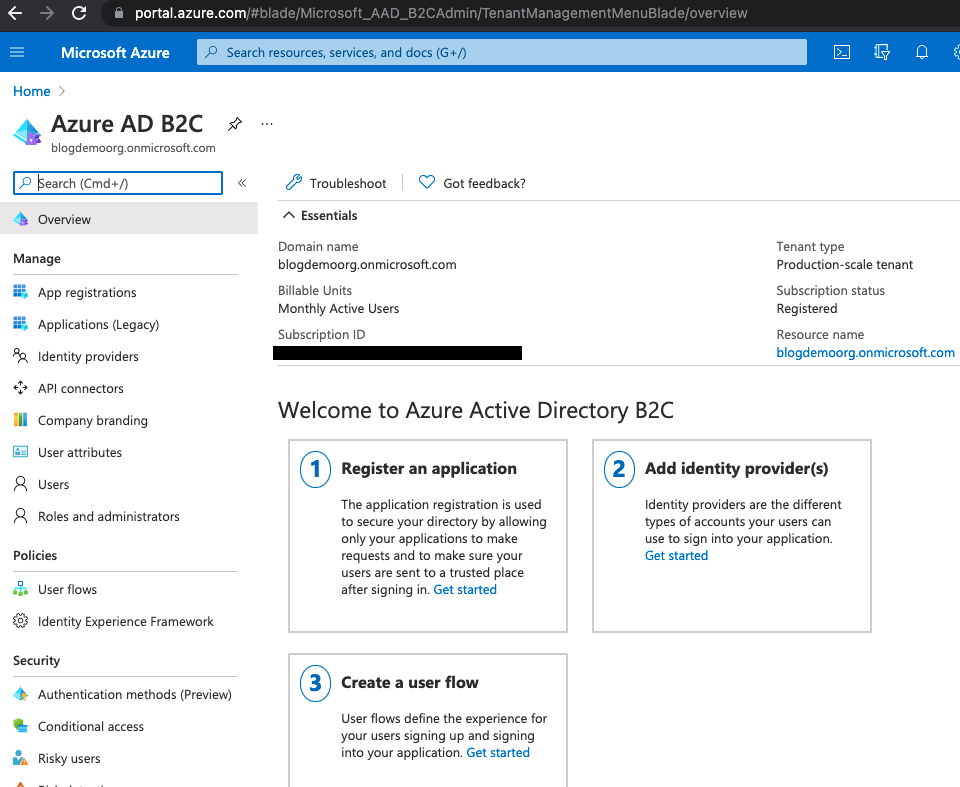
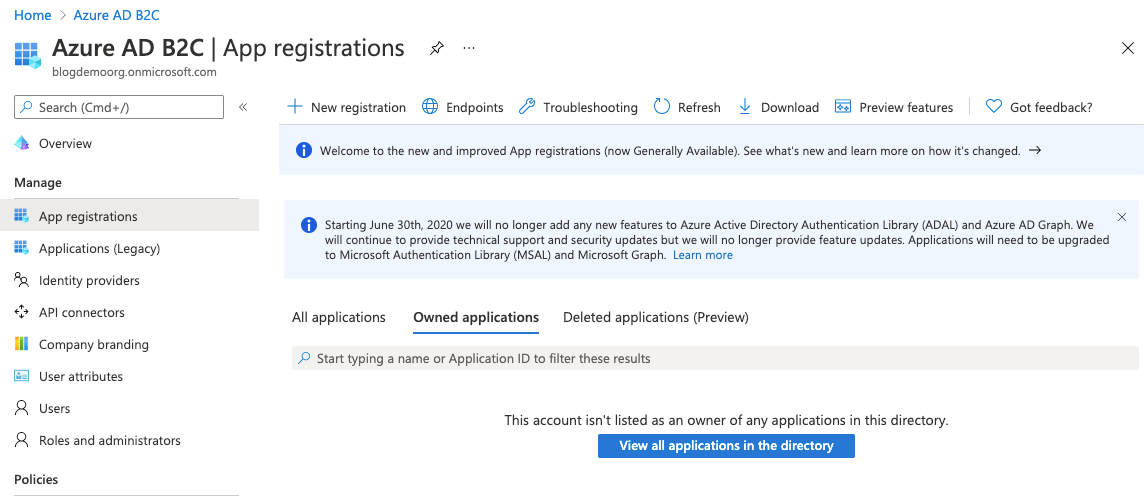
The next step is to register an app, so select the App Registrations blade on the left and then click New Registration

Give your app a name, choose "Accounts in any identity provider or organizational directory (for authenting users with user flows)", and choose "Public client/native (mobile & desktop). A redirect URI simiar to the one shown above should appear, which you can accept. Scroll down and check the box to grant admin consent to openid and offline_access permissions.
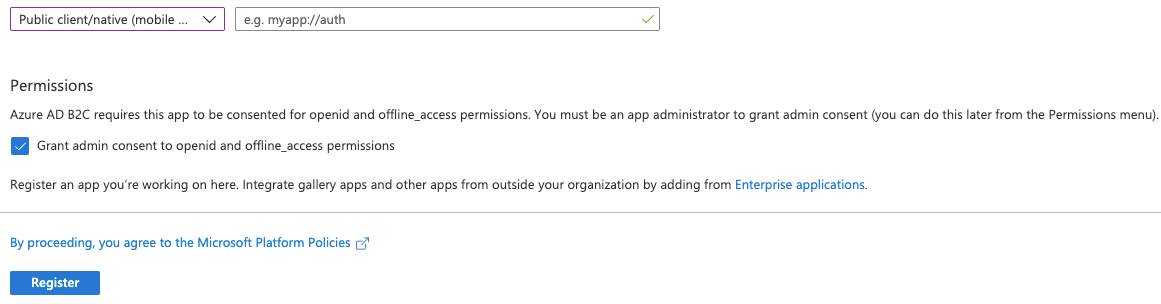
Once you're happy with this click on Register to create the App Registration. You'll be shown an overview of the created App Registration showing some critical details that we'll be using later.

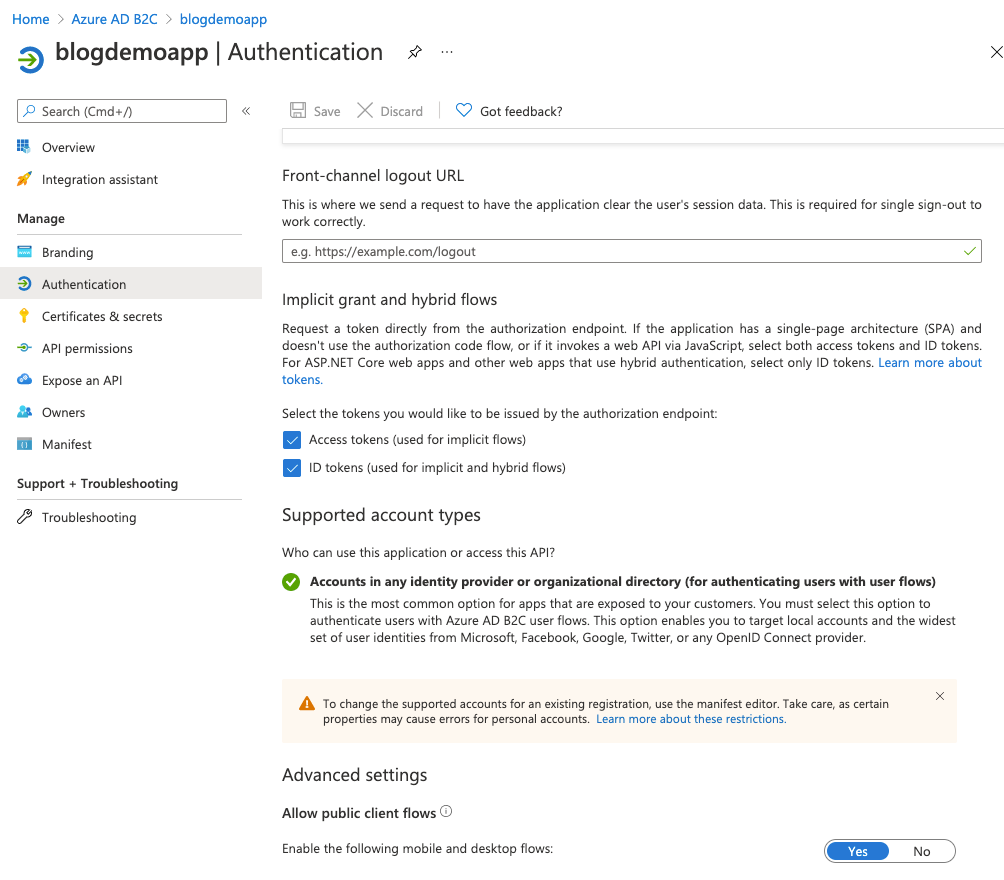
Next, we need to do some auth setup. Click on the Authentication blade on the left and use the Add a platform option to ensure that you have set up "Mobile and desktop applications" and "Web" as shown below.

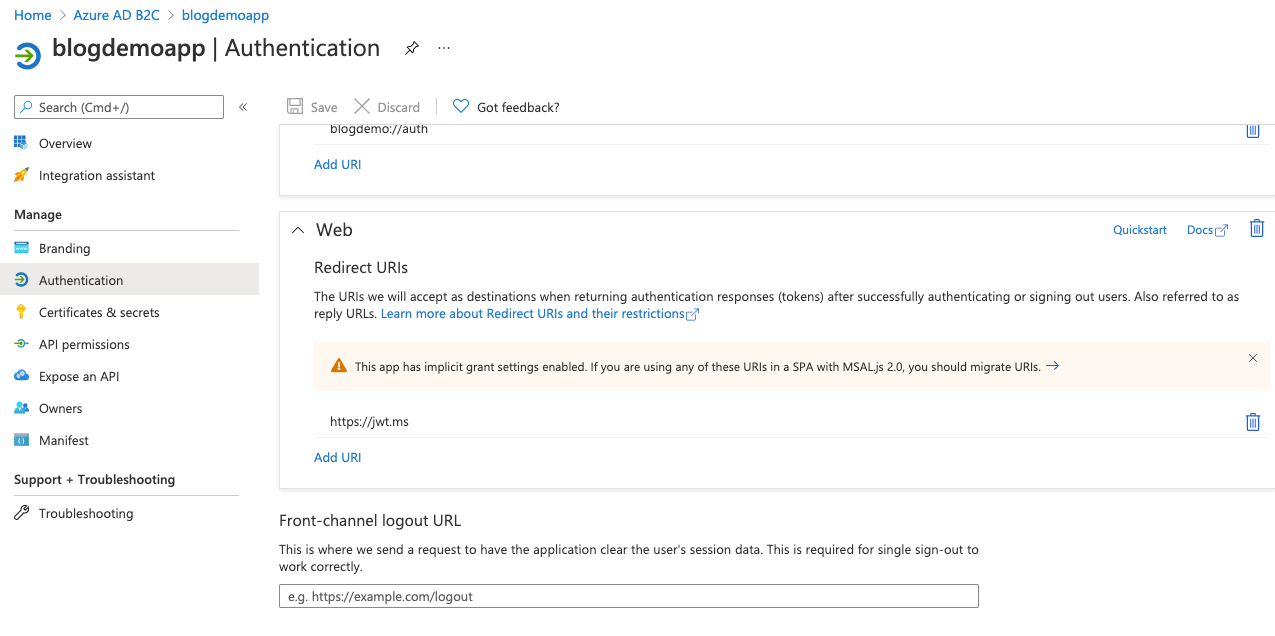
Note those redirect URIs - make sure your last redirect URI for the Mobile and desktop section matches the default value you accepted when you registered the app, and use https://jwt.ms for the web redirect URI. We'll be making use of this soon.
Next, scroll down and ensure that the following options are checked:
- Access tokens (used for implicit flows)
- ID tokens (used for implicit and hybrid flows)
...and then allow public client flows by setting "Enable the following mobile and desktop flows" to yes.
If you select the Overview blade on the left, and then click on Endpoints you'll be shown all the endpoints now setup for your AD B2C configuration.

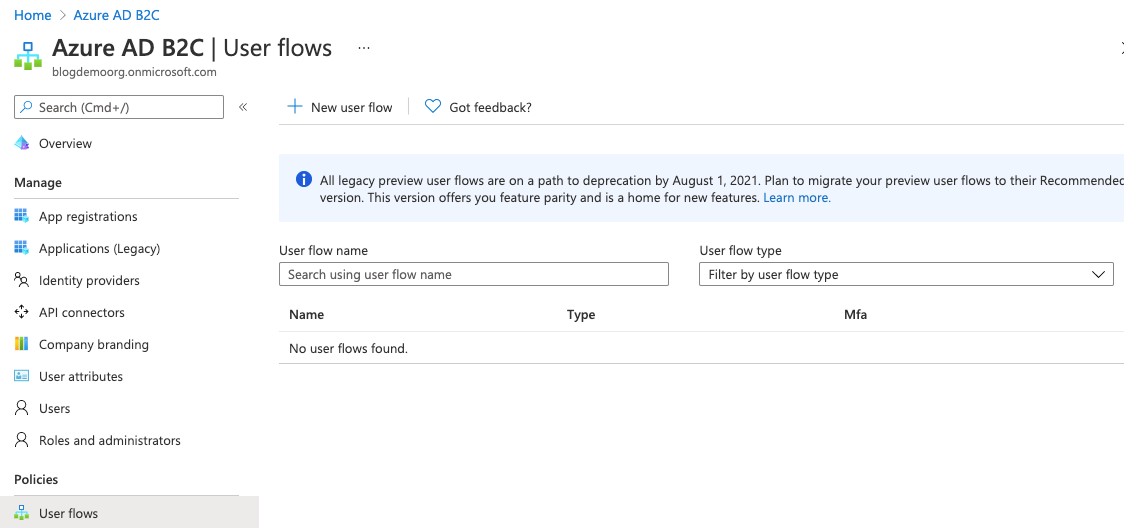
However, we've not finished yet. We won't add any other identity providers for now, but we do need to add a policy. Click on Azure AD B2C in the top left corner and then select the User flows blade. Once in there click New user flow.
You get a few choices here. For now, choose Sign up and sign in.
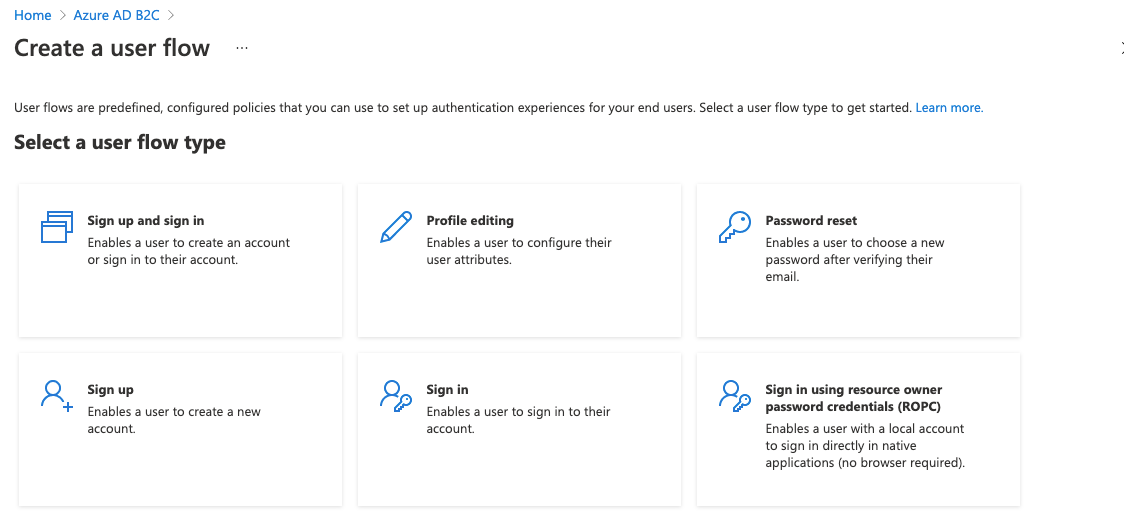
The Xamarin app that we'll write in the next post in this series will cater for profile editing and password resets, but for now we're just concerned with the ability to sign up and sign in.
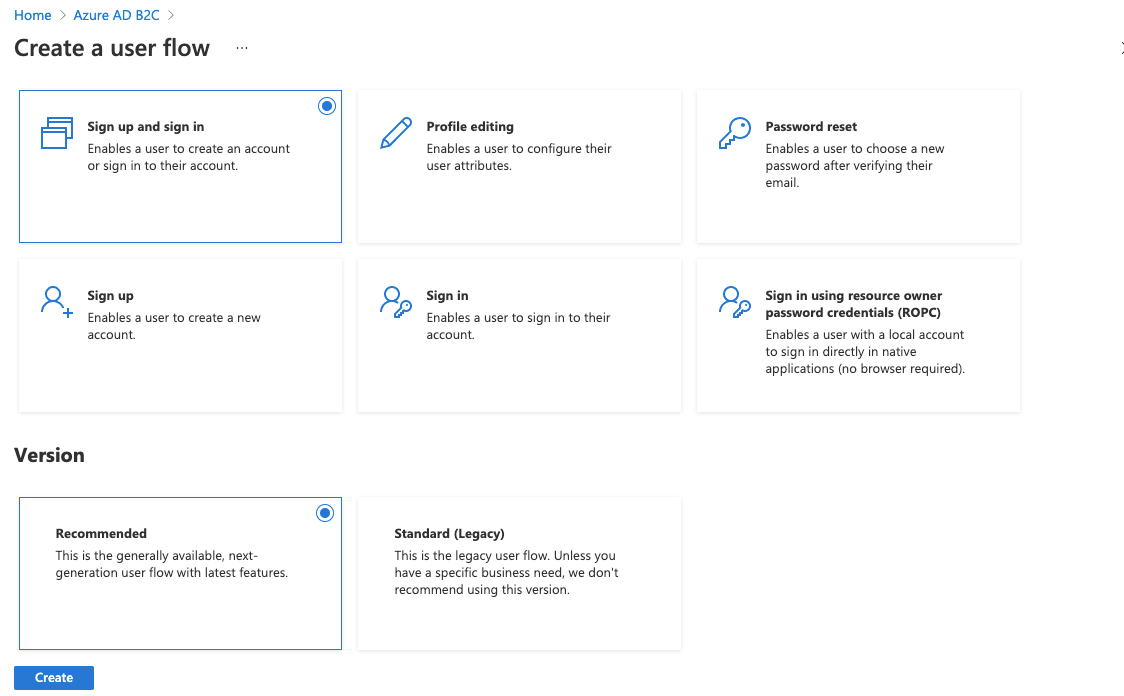
Leave the version set to the default (i.e., Recommended) and click Create
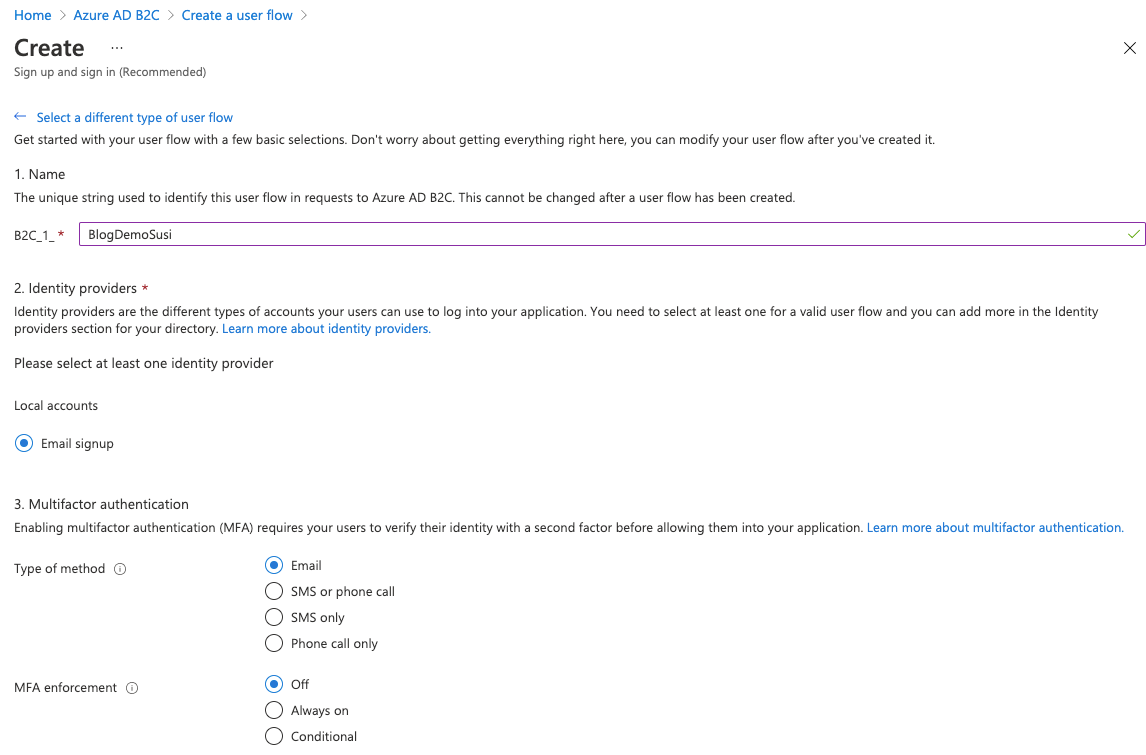
Give it a unique name, choose the Email signup identity provider and leave multi factor authentication off for now.
Once you have this up and running in a real world scenario you'll likely want to come back and switch this on - it works nicely.
We'll also leave conditional access for now, but choose some user attributes and claims. These will dictate the information that's captured during sign up, and the details provided to the app that we'll write.

With all of this in place you should now be able to navigate to a url in your browser and be presented with a login screen. The url will be formatted like this:
https://{HostName}/{TenantName}/{PolicySignUpSignIn}/oauth2/v2.0/authorize?client_id={ClientId}&nonce=defaultNonce&redirect_uri=https%3A%2F%2Fjwt.ms&scope=openid+offline_access&response_type=code+id_token&prompt=login
- {HostName} will be your org name followed by b2clogin.com. For this example it's blogdemoorg.b2clogin.com.
- {TenantName} is your org name followed by onmicrosoft.com - e.g. blogdemoorg.onmicrosoft.com.
- {PolicySignUpSignIn} is the name of the policy you created earlier, e.g., B2C_1_BlogDemoSusi.
- {ClientID} is the Application (client) ID found on the Overview blade of your App Registration.
So for the values we've worked with so far, that will be:
https://blogdemoorg.b2clogin.com/blogdemoorg.onmicrosoft.com/B2C_1_BlogDemoSusi/oauth2/v2.0/authorize?client_id=85......-....-....-....-..........76&nonce=defaultNonce&redirect_uri=https%3A%2F%2Fjwt.ms&scope=openid+offline_access&response_type=code+id_token&prompt=login
Substitute your own values in there and give it a try.
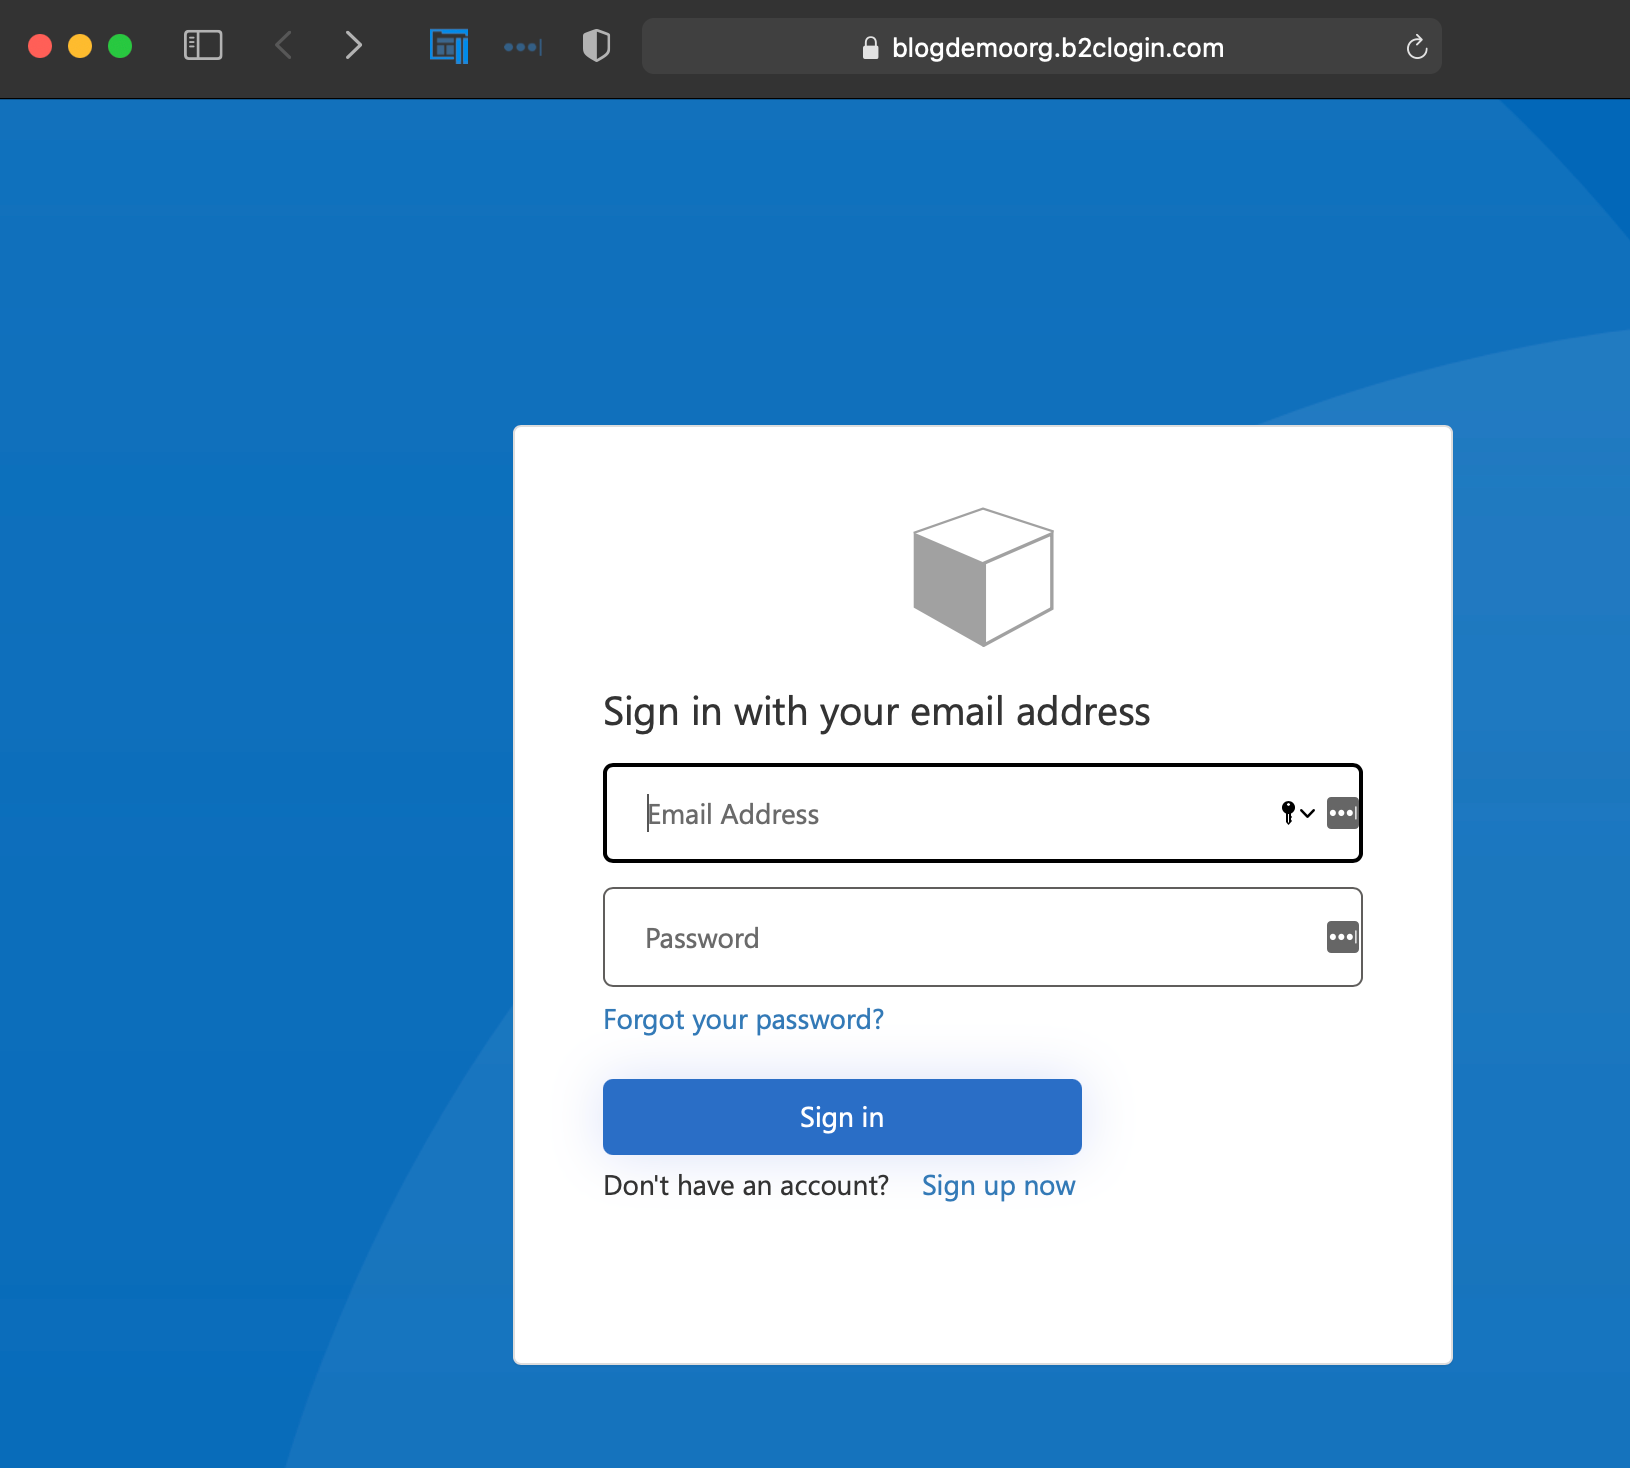
Remember this will be using your new AD B2C tenant and we haven't added any other identity providers, so you'll need to register before you can login. Click on Sign up now to do this.
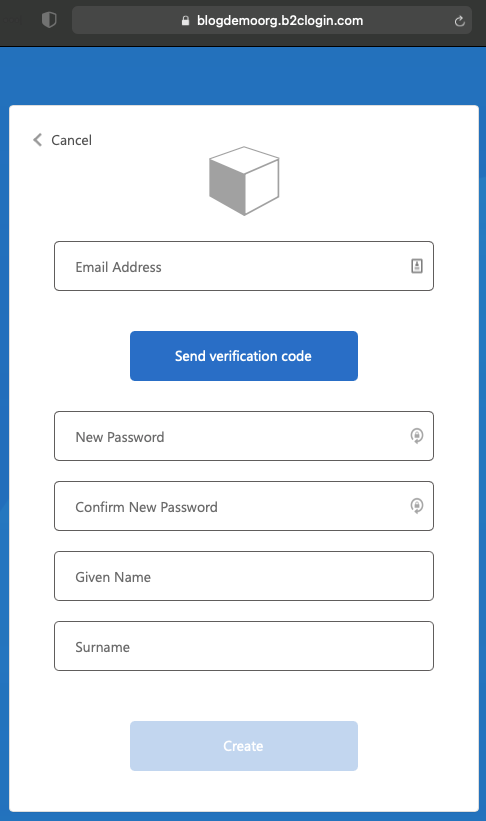
You'll first need to enter an email address and send a verification code. On receipt of that email, enter the verification code to validate the email address and you can then continue to fill in the remaining fields. Note that you're prompted here to enter the bits of information that we requested in the Sign Up Sign In policy.

Click Create - your account will be created and you'll be taken to the redirect URI.
When we come to testing the app in the next post you can use this same account.
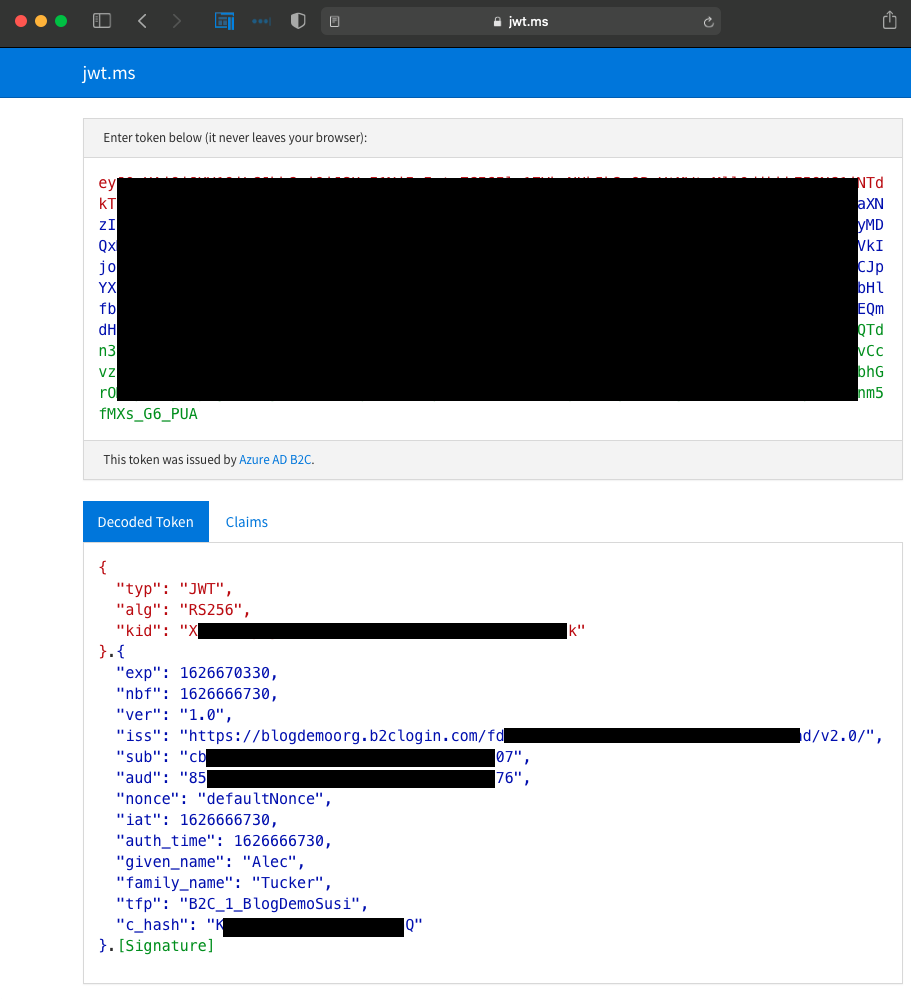
If you're not already familiar with this site, you can use it to decode JSON web tokens (JWTs). See that this shows you the user details that will be returned to the app when we write it, adn well as the policy name and some other pieces of information. When we come to securely accessing an API we'll be interested in that "aud" (audience) value.
Note that this is not our access token. There's a bit more work required to get that. For now, copy the url from this web page and paste it somewhere for later. We now need to set up Postman to use the authentication code that you'll get from the url shortly and request an access token, but first there's a little more Azure configuration required. In order to allow Postman to request the access token we need to authorise it to do so, which we'll do by creating a client secret, and by specifying that secret in the call that Postman makes.
So, jump back to the Azure portal, select the App Registration that we've been working with and then choose the Certificates & secrets blade.
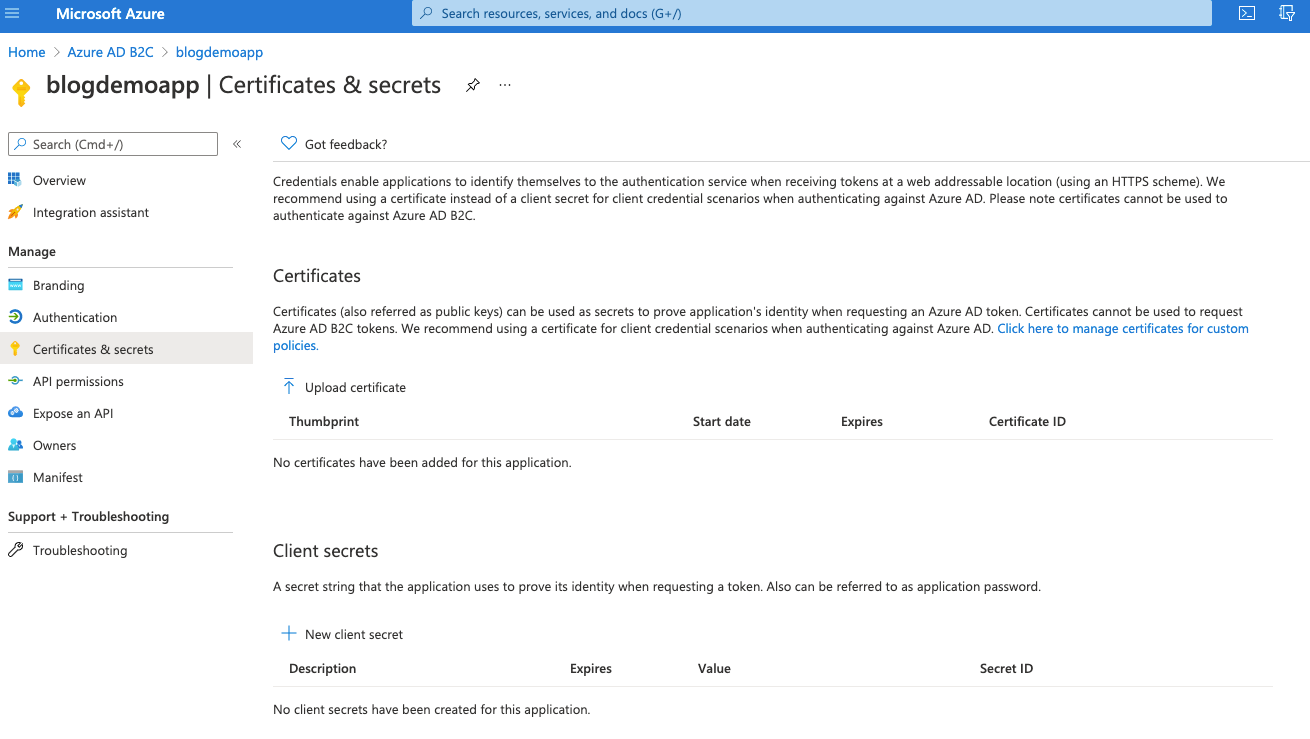
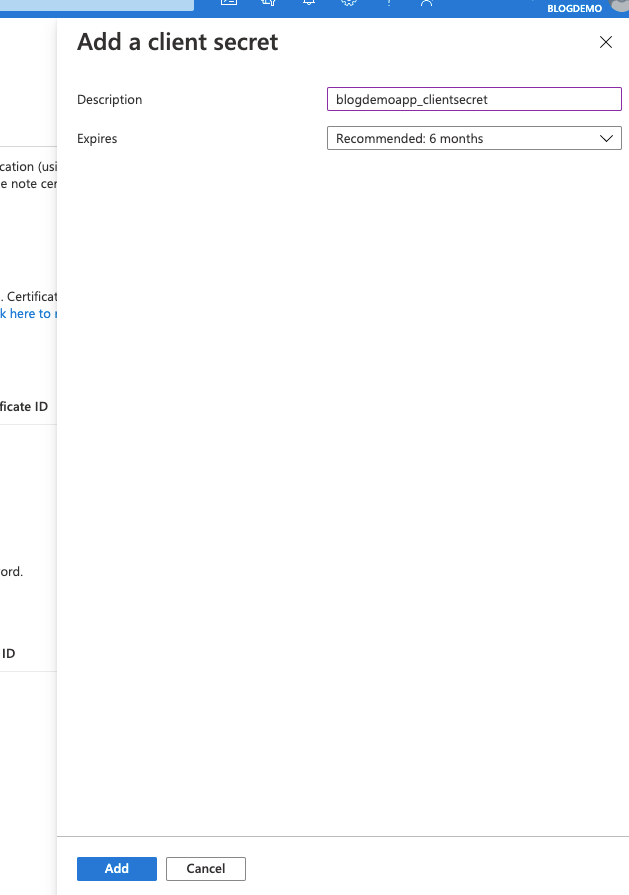
Click on New client secret, give it a namem accept the default expiry for now and click Add.
Once created, the secret will be visible on screen. Make a copy of it and store it securely, as this will be the only time that you're able to see it.
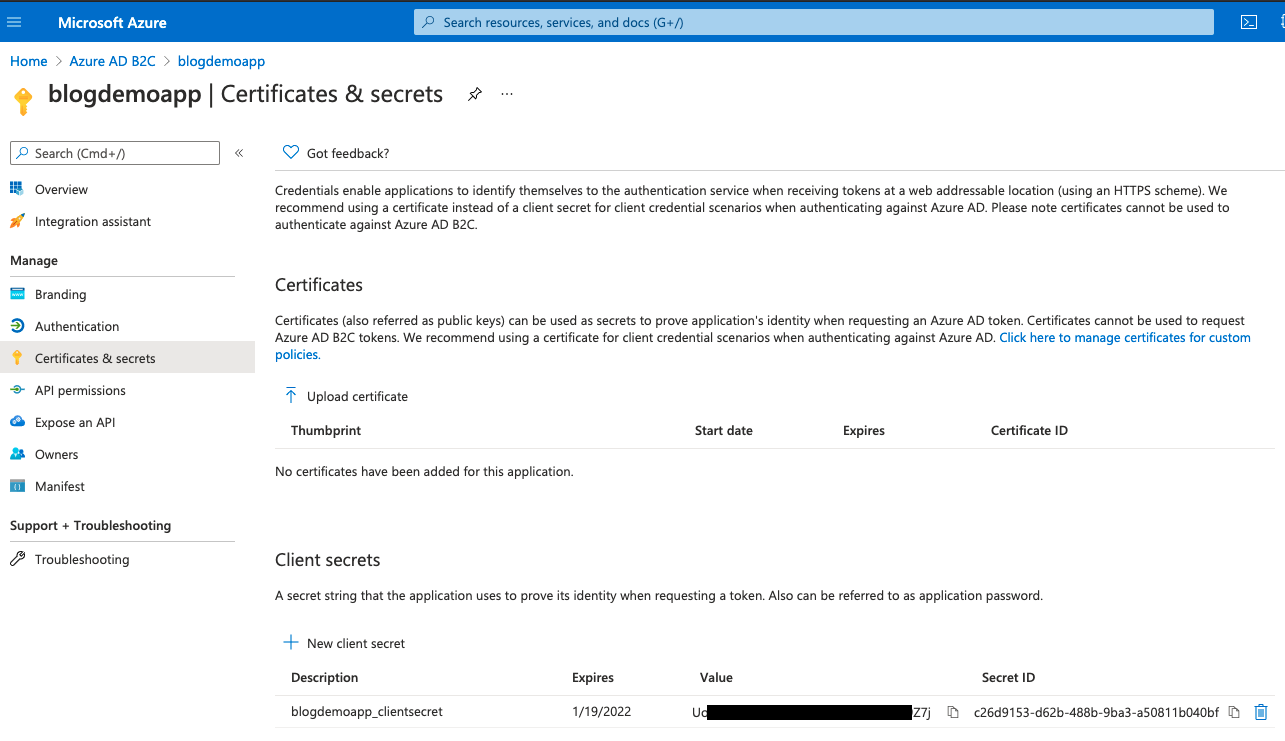
The actual secret is the value column at the bottom there.
Before we jump back to Postman click the Overview blade and then select Endpoints at the top to show all our AD B2C endpoints.
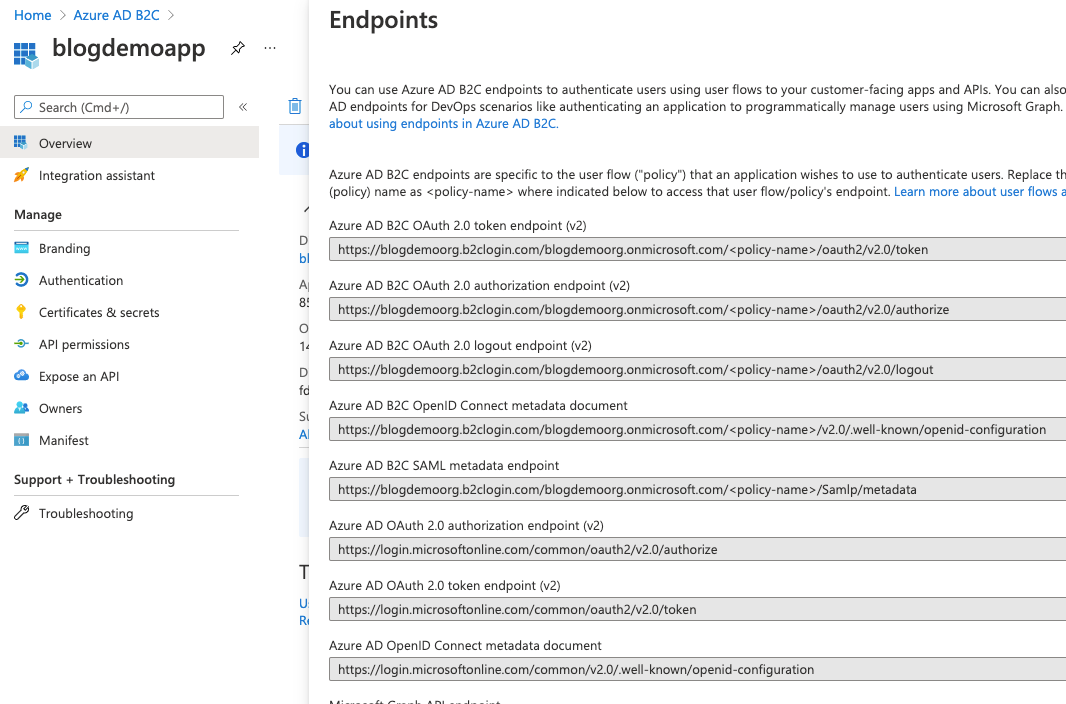
That top one is the one we need to make the Postman call to, replacing <policy-name> with the name of the Sign Up Sign In policy we created.
So in Postman, create a new request, give it a type of Post, and enter your url, which should look like this:
https://blogdemoorg.b2clogin.com/blogdemoorg.onmicrosoft.com/b2c_1_BlogDemoSusi/oauth2/v2.0/token
Before you click Send to try this out you'll need to add some more details to the body of the post. Select the Body tab, choose x-www-form-urlencoded and enter your values.
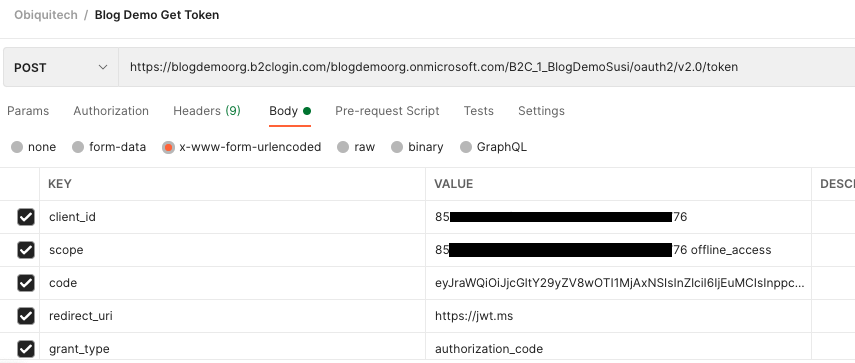
Note that:
- client_id is the Application (client) id of the App Registration
- scope is that same id, followed by a space, followed by "offline_access"
- code is the authorisation code that we'll discuss in a second
- you'll need an extra line with a key of "client_secret" and a value of the secret that you stored securely earlier
So where do we get that authorisation code from? Remember the url that you copied a while back after the successful authentication? It's in there. That url will be formatted like this:
https://jwt.ms/#code={authorization_code}&id_token={id_token}
Extract the authorisation code and put it into Postman.
Note that if you're following this step by step then your authorisation code will likely have expired by now and you'll need to go back to that login screen and login again to get a new one.
If you see this:

...then you'll need to repeat those login steps again to get a new authorisation code.
Once you've got a valid authorisation code you should see something like this:
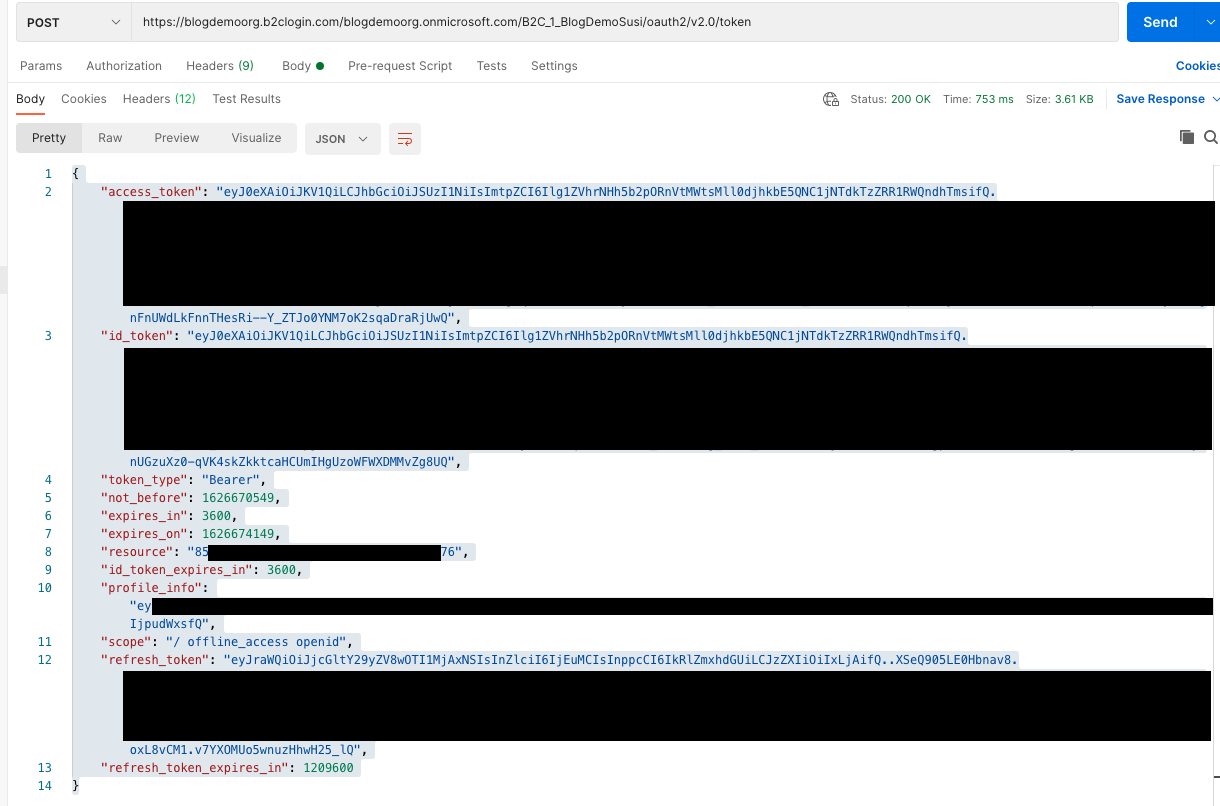
That's it. We've now successfully set up and tested Azure AD B2C.
The next post in this series will detail how to integrate this into a Xamarin.Forms app.