3. Write an Asp Net Core API and deploy it to an Azure App Service

This is the third post in a series that covers creating a Xamarin.Forms app and an API, both secured by AD B2C, detailing the Azure configuration and the necessary code. It builds on the previous two posts, but can be read in isolation.
In this post we'll create the Api and run it locally, before configuring an App Service on Azure and deploying it there.
TL;DR - the code is here: https://github.com/AlecDTucker/ADB2C-XF-API
As with the previous posts, the screenshots you'll see are taken from Visual Studio for Mac, but the Windows version will be similar.
Also, in common with other posts in this series, you'll see redacted ids. See my comments and links on this in the previous post. There should be enough information visible in these ids to distinguish between them.
So let's create the Api project. From File -> New Project choose Api under Web and Console -> App:

Hit Next and choose .NET 5 as the target framework. Select Individual Authentication (in-app) and be sure to configure for HTTPS.
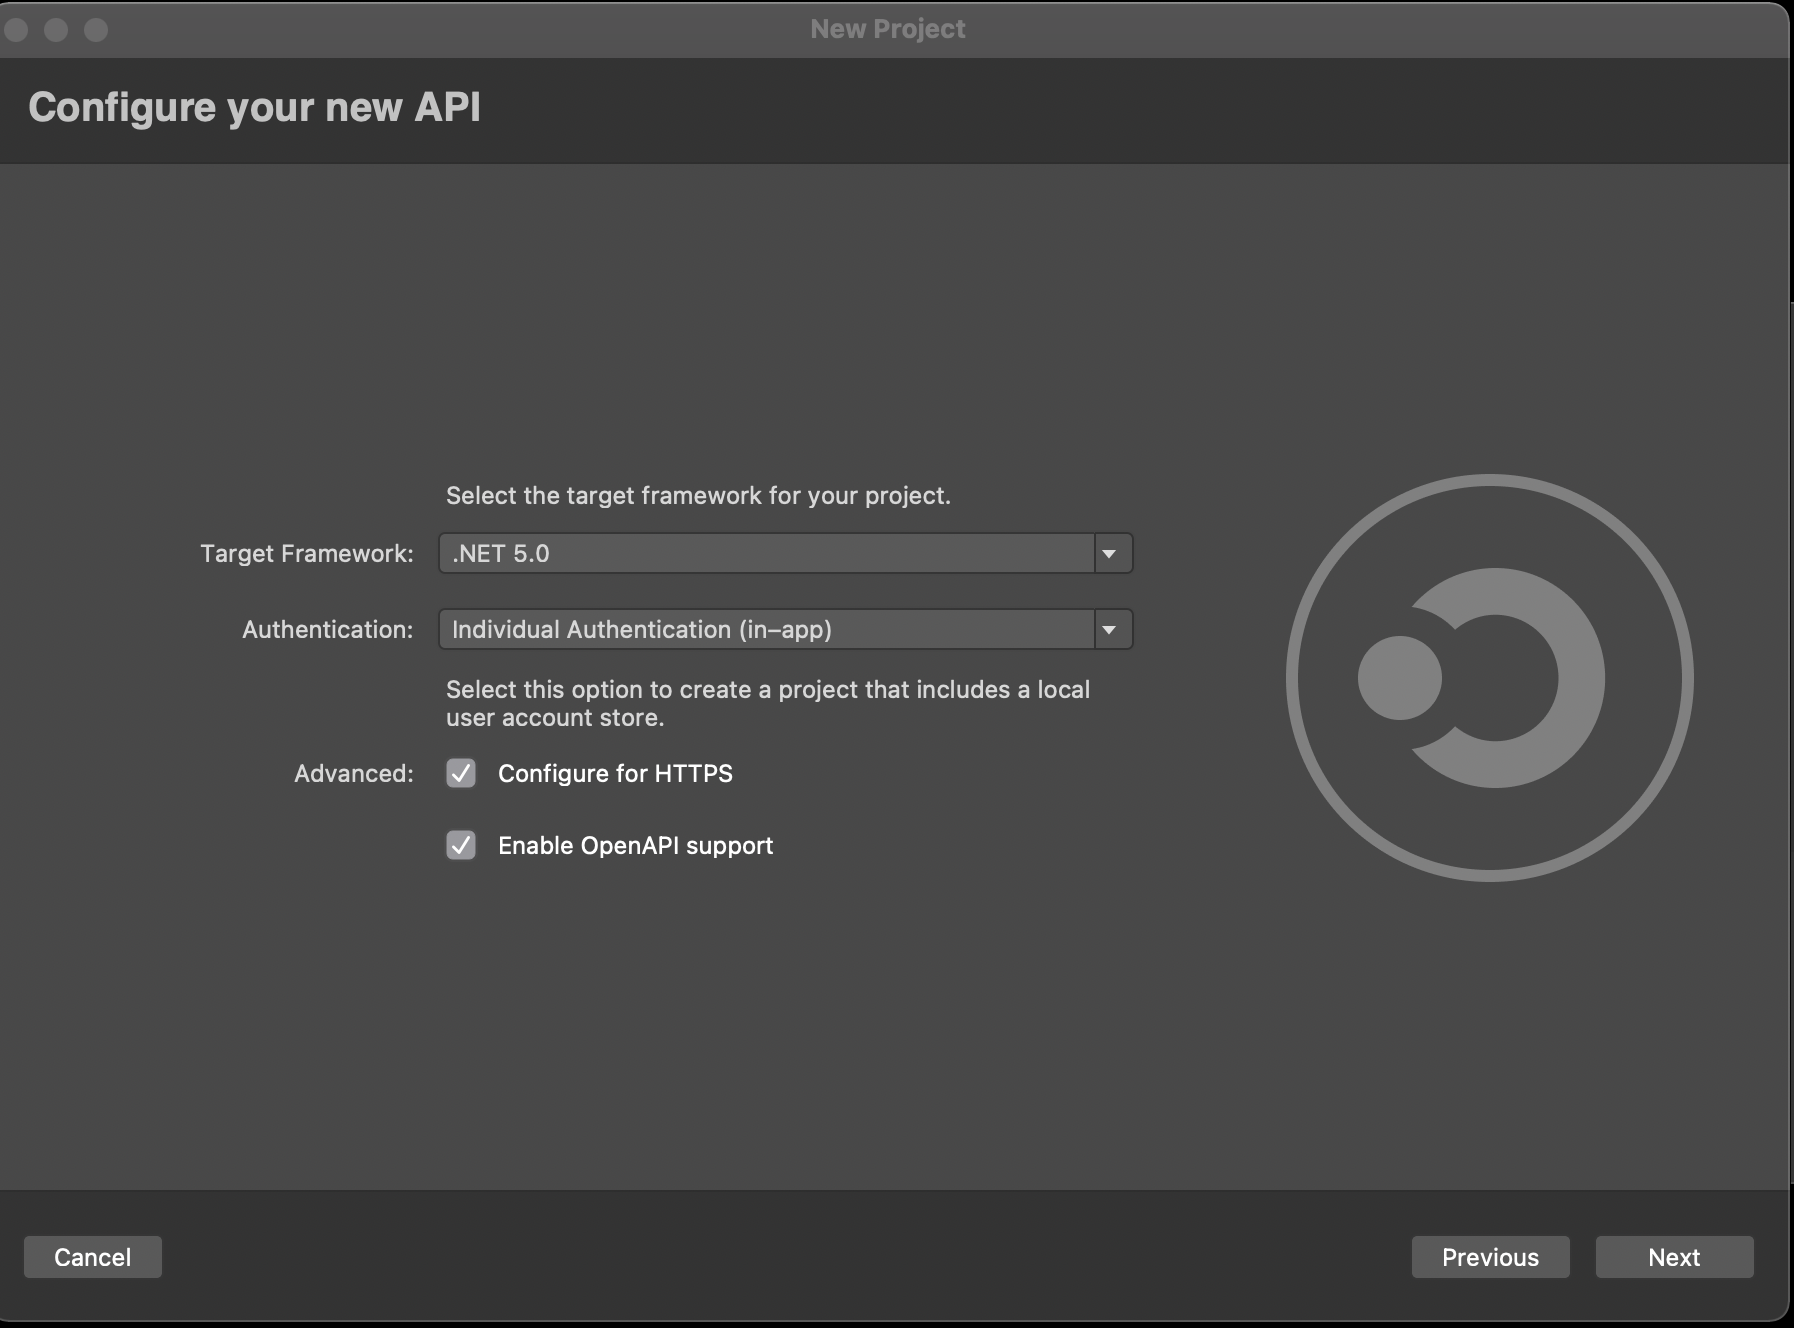
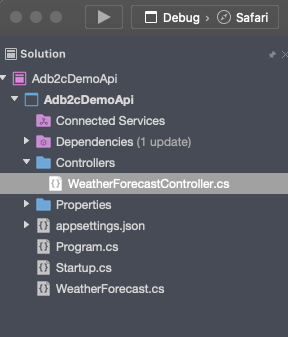
Give it a name, and choose your source control. This should create a project for you that looks like this:
When we created this, we asked for authentication capability to be included. We'll add authentication in the next post - this post will just deal with getting the Api up and running, testing it and deploying it. This means that the first thing we need to do is comment out a few things. We'll put these back in and flesh them out in the next post.
You'll see that this project is set up with configuration data in appsettings.json. More on this next time.
First, open up startup.cs and comment out the first two lines in the ConfigureServices method. This is where the authentication is set up.
        //services.AddAuthentication(JwtBearerDefaults.AuthenticationScheme)
//   .AddMicrosoftIdentityWebApi(Configuration.GetSection("AzureAdB2C"));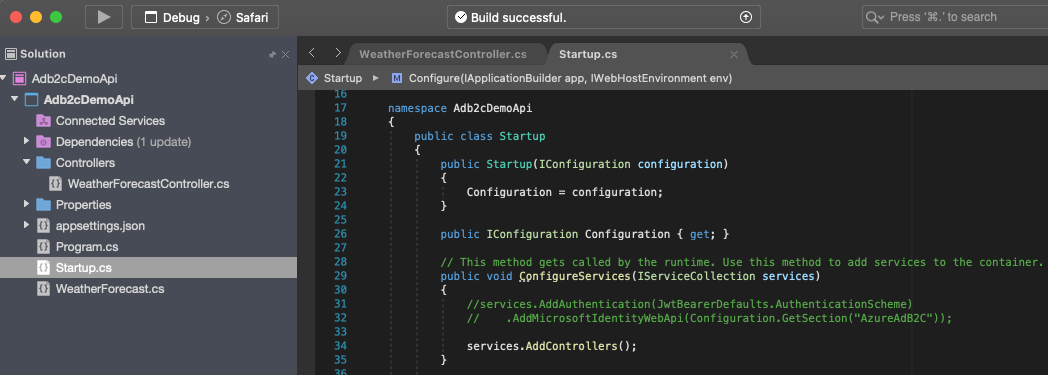
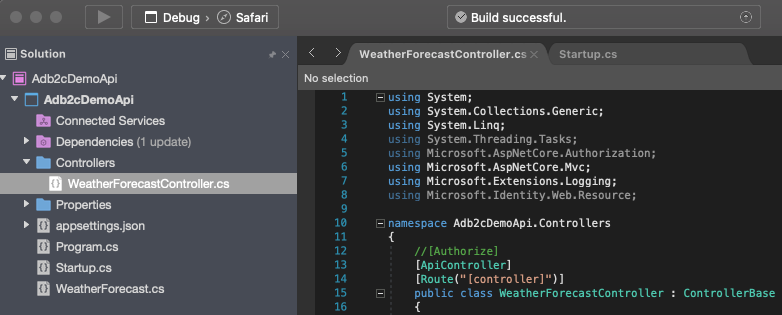
There's one more thing we need to comment out before we can run this code. Open Controllers/WeatherForecastController.cs and comment out the following line:
//[Authorize]
Now you can run the code, and you should see this:
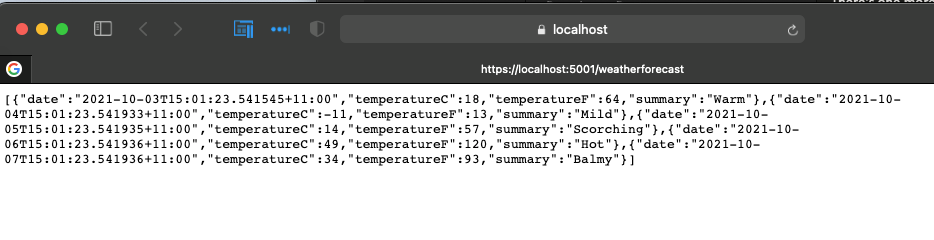
You now have a working API. If it's your first one, congratulations! It's pretty simple, but it gives you a good starting point.
Next we're going to implement Swagger. This is a great way of adding some basic documentation and testing capability to your API, and it can be implemented in three simple steps:
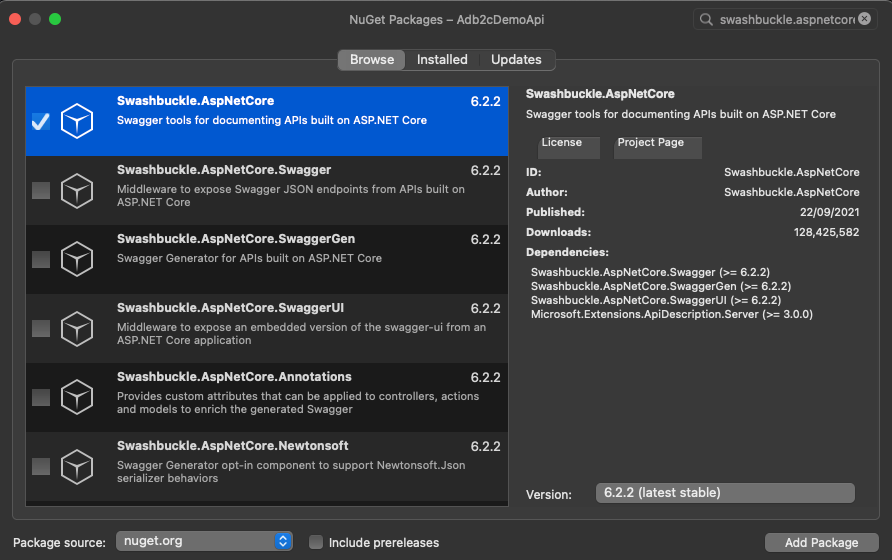
Step 1 - Add the Swashbuckle.AspNetCore NuGet package
Right click on your project in Solution Explorer, select "Manage NuGet Packages..." and search for "Swashbuckle.AspNetCore". Once you've found it, install it in your project.
Step 2 - Add code to ConfigureServices:
Add this code to the end of the ConfigureServices method in Startup.cs
services.AddSwaggerGen();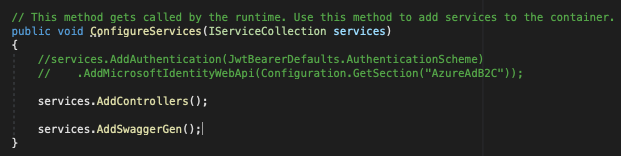
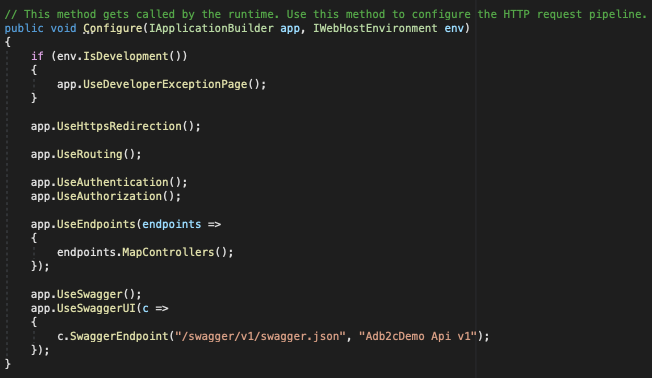
Step 3 - Add code to Configure:
Add this code to the end of the Configure method in Startup.cs:
app.UseSwagger();
app.UseSwaggerUI(c =>
{
    c.SwaggerEndpoint("/swagger/v1/swagger.json", "Adb2cDemo Api v1");
});
That's it! Now run your code and you'll see this again:

The URL here is:
https://localhost:5001/weatherforecast
Now change the URL to this:
https://localhost:5001/swagger/index.html
...and you'll see the output from Swagger.
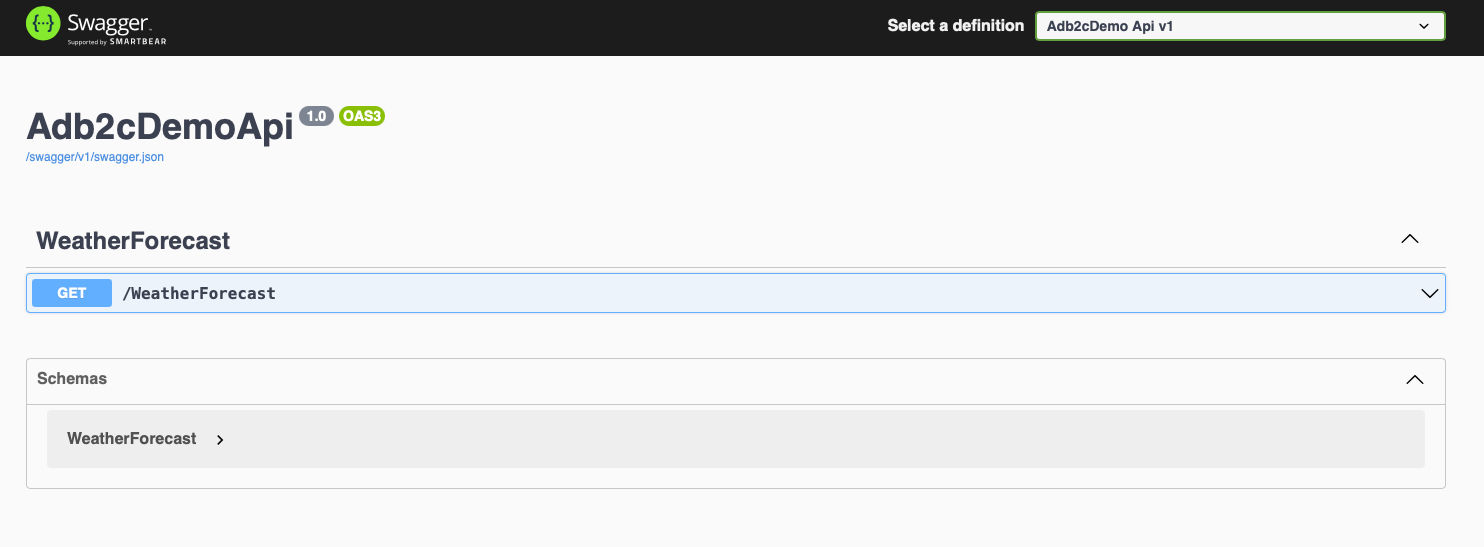
You can expand the "WeatherForecast" section and click "Try it out".
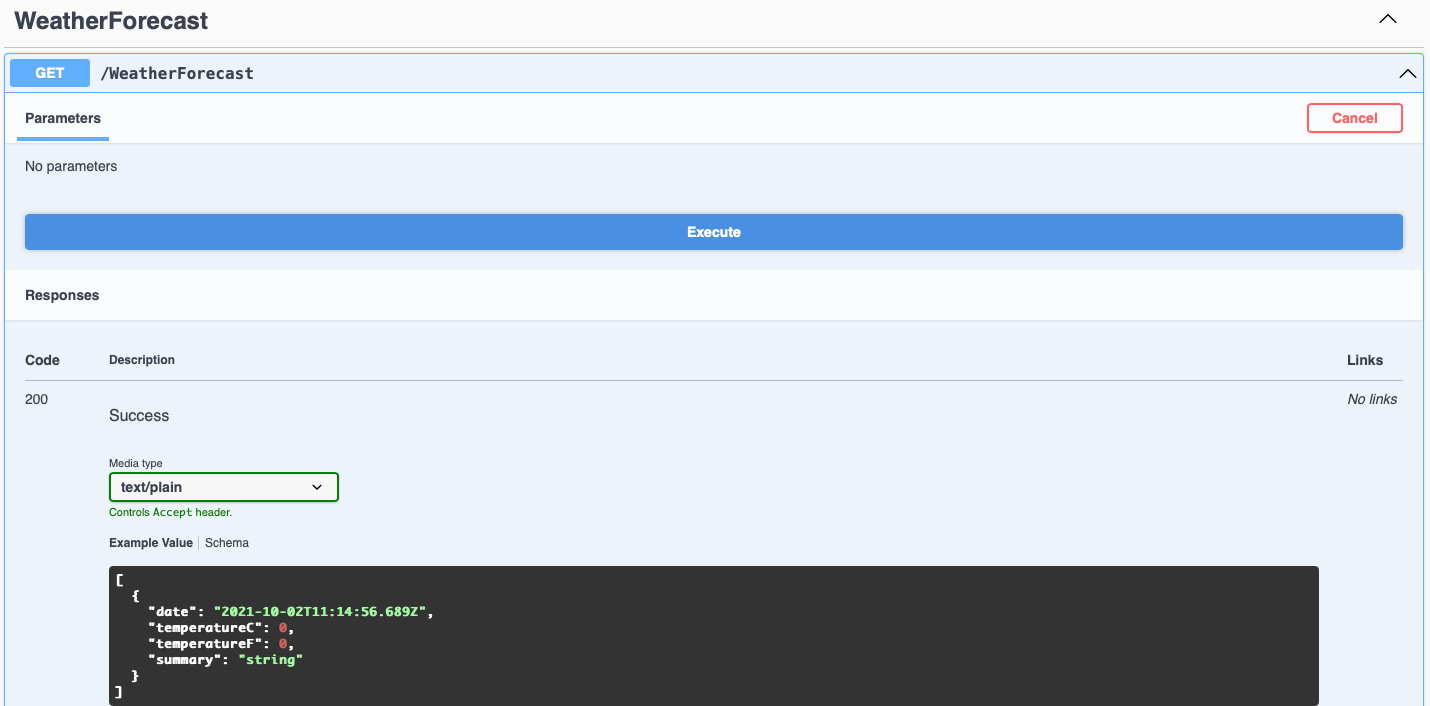
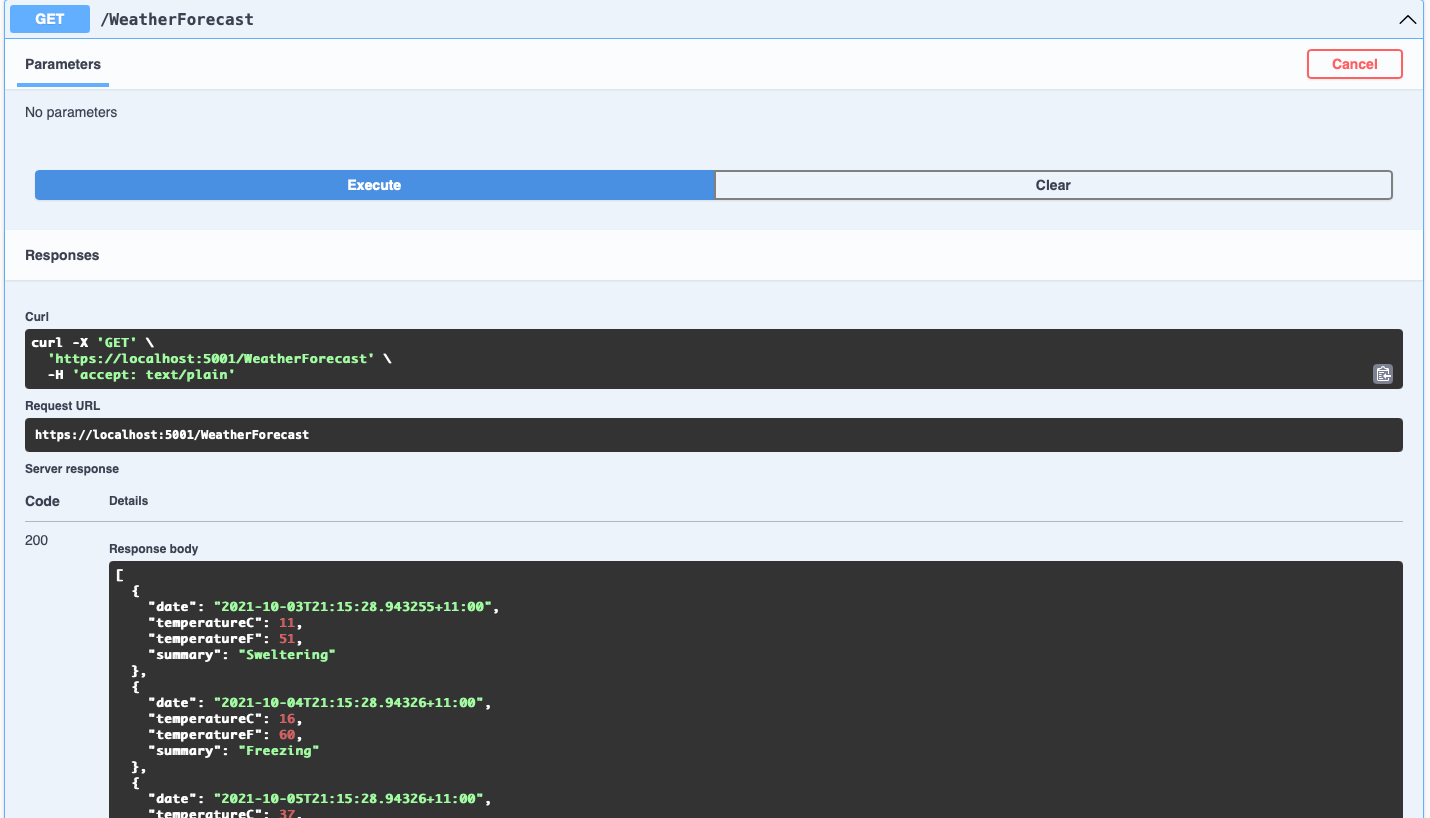
That will show you an "Execute" button, which will call the API and display the results.
Now we've written and tested our API we can move on to the deployment to an Azure App Service.
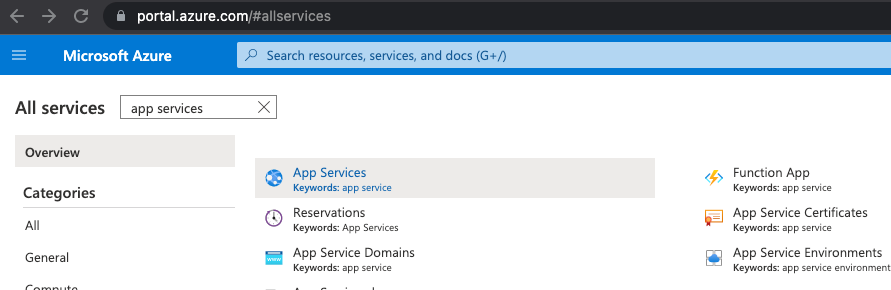
We'll start by logging into the Azure portal (https://portal.azure.com) and selecting App Services.

If you don't see App Services listed here then click on "More services" and search for "app services".
Depending on your subscription setup you might now be presented with this page:

If so, you'll need to start a free trial to continue.
Once you've done that, you should see this page under App Services:
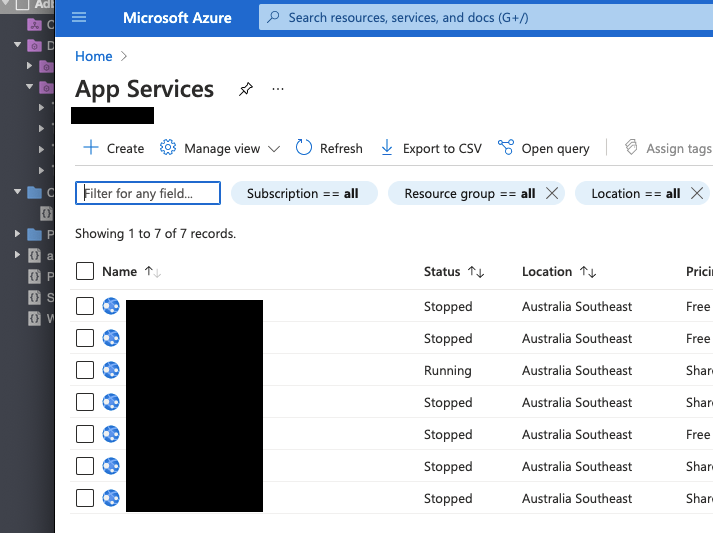
Click on "+ Create" to add a new app service. You'll need to select a few things during this process.
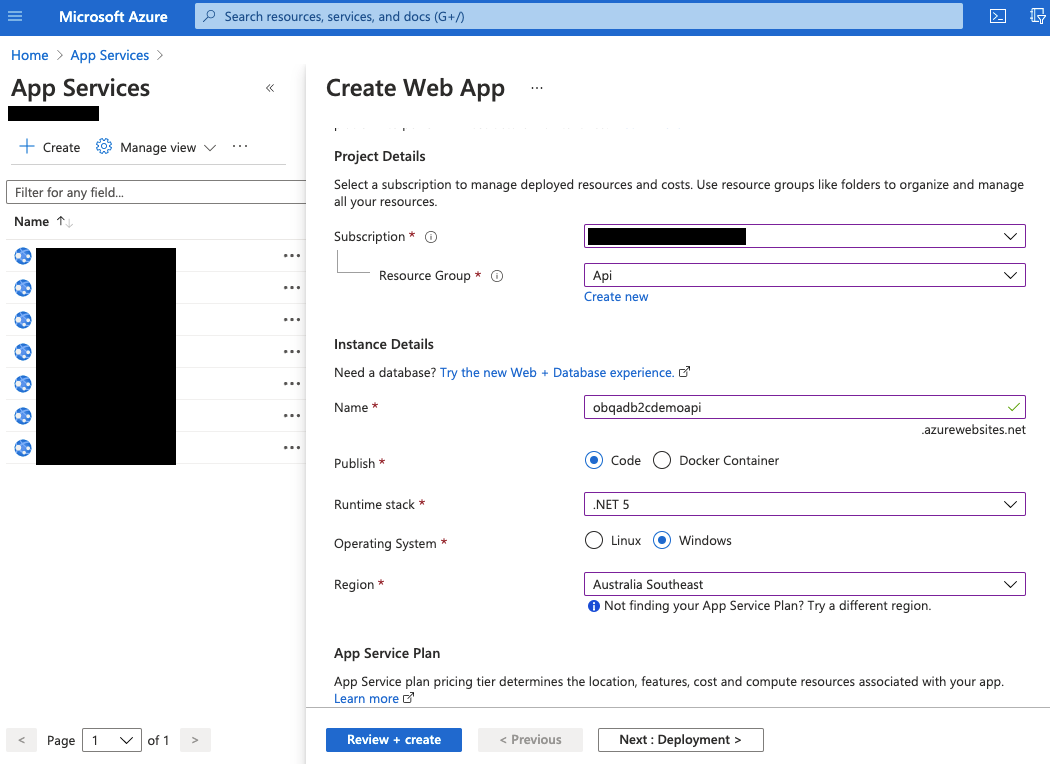
- Choose the subscription (which you probably just created). Yours might be called "Free Trial".
- Create a new resource group, and select it.
- Choose a web app name. This needs to be unique, so perhaps prefix it with your company name. I'll choose "obqadb2cdemoapi". There's a pretty good chance this is unique!
- Under "Publish" select ""Code", choose a runtime stack of ".NET 5" and set your operating system to "Windows".
If you spend some time on Google you'll find some good write-ups on the costs and benefits of Windows vs Linux. If you're taking an Api to Production, these are recommended reading.
- Select a region that best represents where your end users are likely to be calling the Api from. I've chosen Australia Southeast.
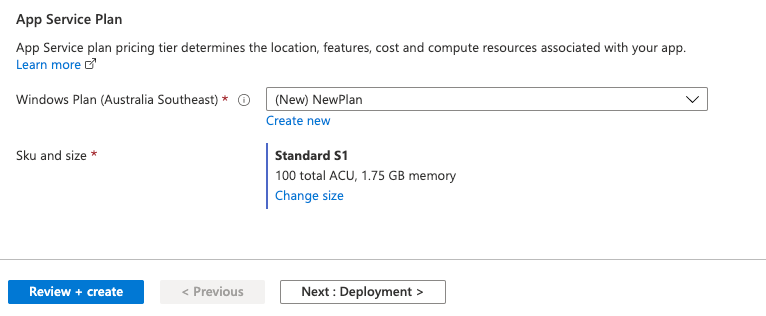
- Scroll to the bottom of this page to set up and select an App Service Plan.
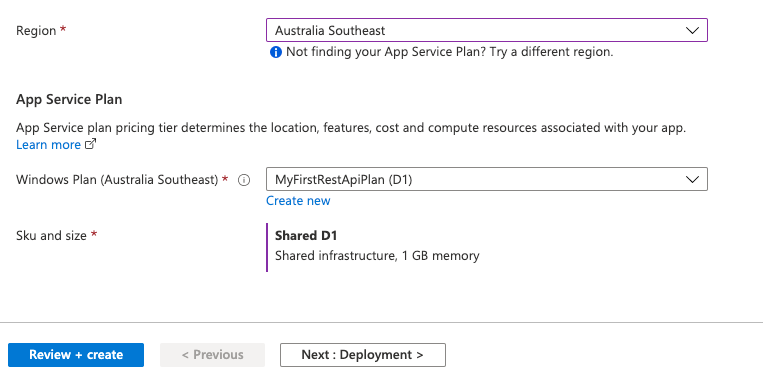
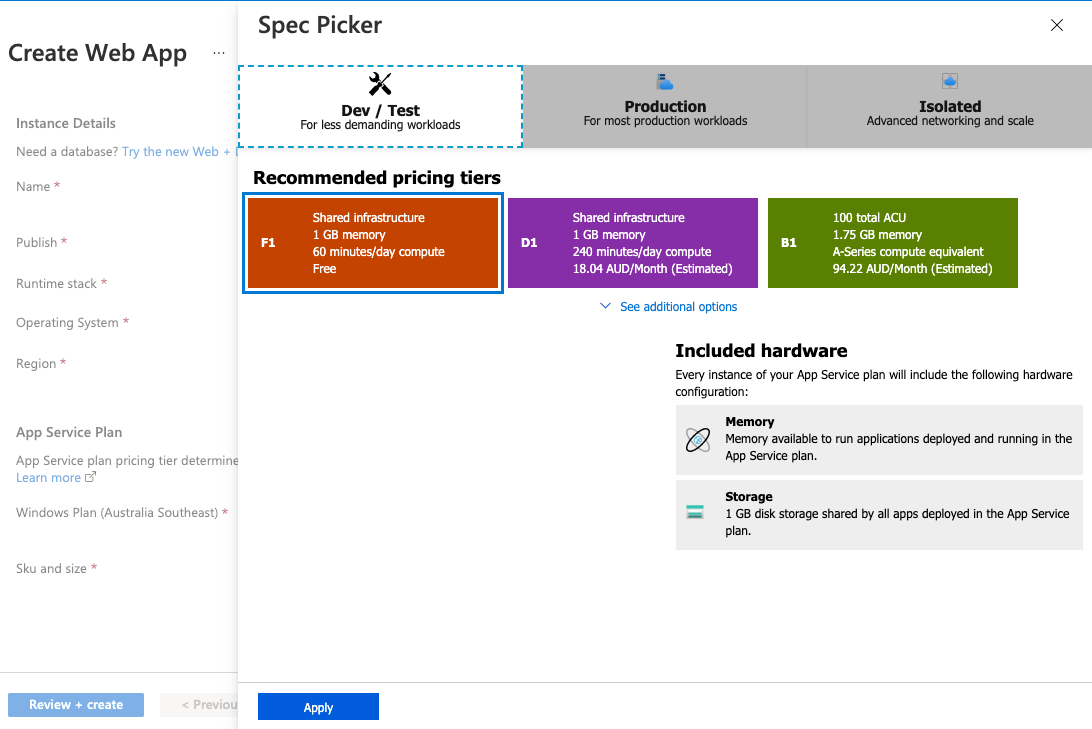
Check the options carefully here and be sure to choose a free / low cost option to get you going. If you create a new one, be sure to click "Change size" under "Sku and size".
Select "Dev / Test" and choose an appropriate pricing tier. This screenshot shows the free option being selected.
Make your way through the remaining steps and take a look at the other options available to you. For now, I recommend the following:
- Deployment: Disable continuous deployment - we're not using it in this example
- Monitoring: Disable Application Insights - again, we're not using it in this example
- Tags: None required
This should leave you on the "Review + create" page. Check the details that you've entered and click "Create". This will start the creation and deployment process, which will take a few minutes. When it's completed you'll see this:

Click "Go to resource" to view all the settings.
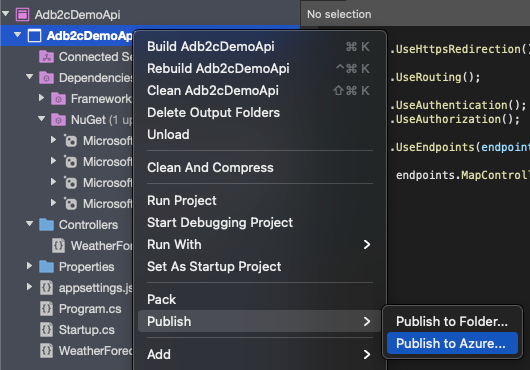
Now let's go back to Visual Studio. Right click on the project and select Publish -> Publish to Azure.
Authenticate if necessary and you should see your app service listed. If not then hit "Refresh".
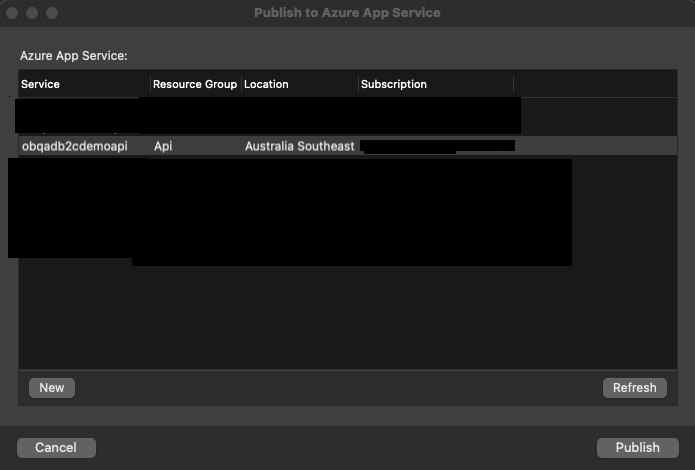
Select your app service and hit Publish. Visual studio will build your Api and then publish it to Azure.
You might see Visual Studio having some fun here. It may ask you to authenticate and if it does, it might ask you multiple times. Its record so far with me is seven times! This is far from ideal. Of course, you should have multi-factor authentication enabled on your MS account, making this process even more, er, fun.
On completion, a browser window should open and navigate to your Api. Note that this time it will just navigate to the base url. You'll need to edit it and add "/weatherapi" onto the end to see the same output you saw when you ran it locally. To view the Swagger output, remove "/weatherapi" again and add instead "/swagger/index.html".
Congratulations - you've just deployed your Api to an Azure App Service!
In the next post we'll implement the authentication and link it to the app. Until then, happy coding!